Setting up automatic login with SAML
General informationGeneral information
Setup requires advanced knowledge of SAML 2.0, single sign-on, and your identity provider. Once initialized as described here, login can be configured via the nele.ai admin area at https://manage.nele.ai/sso; please also read the corresponding manual articlemanual article on this topic.Advanced knowledge of SAML 2.0, single sign-on and your identity provider is required to set it up. After initializing as described here, the login can be done via the admin area of nele.ai at To be set up, read also the appropriate on the subject.
Members who automatically receive a nele.ai account via single sign-on are not automatically deleted or deactivated. These members can be deleted manually at https://manage.nele.ai/users.Users who automatically receive a Nele.ai account via single sign-on are not automatically deleted or deactivated. These users can manually go to be deleted.
Identity provider settingsIdentity provider settings
Create a new app in Microsoft Entra ID. Use the "New application" button and then select "Create your own application".Create a new app at . To do this, use the “New application” button and then “Create your own application.”

Then, choose an app name and select "Integrate any other application you don't find in the gallery”.Then choose an app name and “Integrate any other application you don't find in the gallery.”

Set the single sign-on method to "SAML".Set the single sign-on method to “SAML”.

For the following configuration, ignore steps 1 and 2 for now, download the "Certificate (Base64)" from step 3, and copy the Microsoft Entra identifier and the login & logout URLs from step 4.In the configuration below, first ignore steps 1 and 2, download the certificate “Certificate (Base64)” from step 3 and copy the Microsoft Entra Identifier and the login & logout URLs from step 4.

nele.ai settingsNele.ai settings
Enter the copied values into the nele.ai settings in the admin area at https://manage.nele.ai/sso.Add the copied values to the Nele.ai settings in the admin area one.
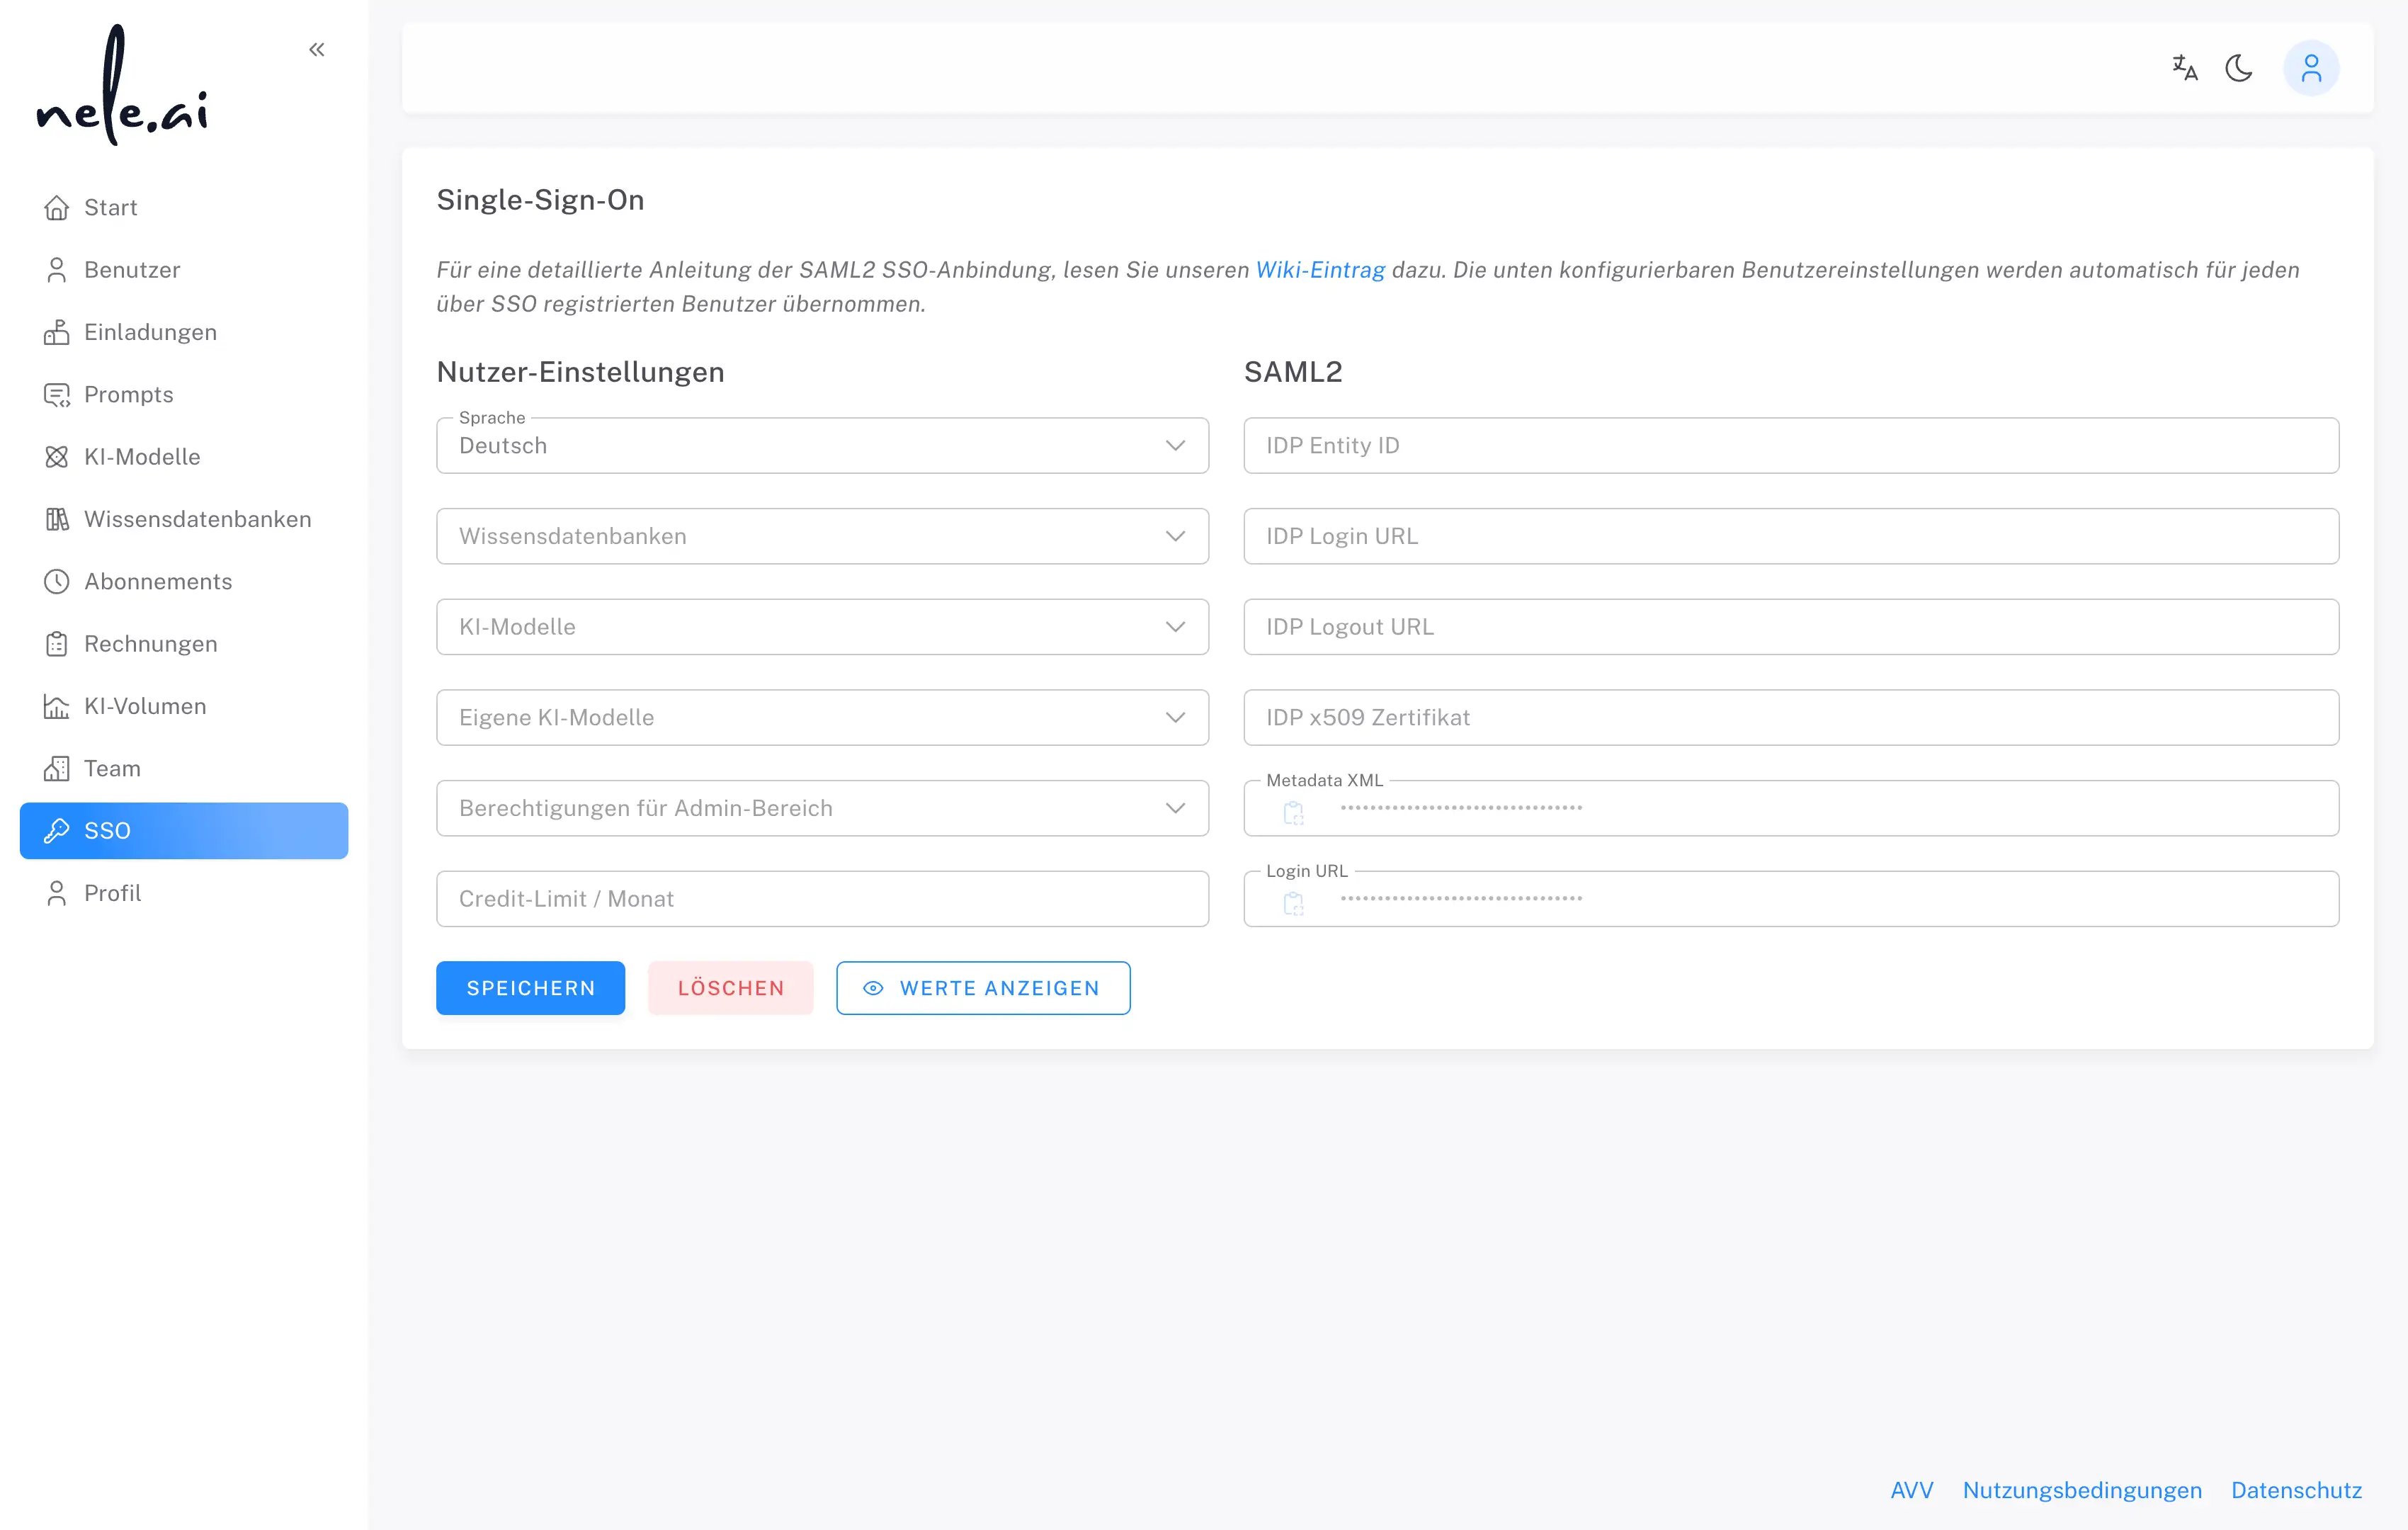
- IDP entity ID – Microsoft Entra identifier from step 4- IDP Entity ID — Microsoft Entry Identifier from step 4
- IDP login URL – Login URL from step 4- IDP login URL — login URL from step 4
- IDP logout URL – Logout URL from step 4- IDP logout URL — Logout URL from step 4
- IDP x509 certificate – Certificate (Base64) from step 3- IDP x509 certificate — Certificate (Base64) from step 3

After that, you can save the configuration in nele.ai and open the generated metadata XML for the Entra ID configuration.You can then save the configuration in nele.ai and open the generated metadata XML for the Entra ID configuration.

In step 1, enter the entityID (URL, ends in "/metadata") as the Identifier (Entity ID) and the "Reply URL" (URL, ends in "/acs").In step 1, enter the identifier (entity ID) the value entityID (URL, ends in “/metadata”) and the “reply URL” (URL, ends in “/acs”).
In step 2, set the "Unique User Identifier (Name ID)" to "user.mail [nameid-format:emailAddress]".In step 2, set the “Unique User Identifier (Name ID)” to “user.mail [nameid-format:emailAddress]”.

To transfer group memberships, additionally add a group attribute named http://schemas.microsoft.com/ws/2008/06/identity/claims/groups.To transfer group memberships, add an additional group attribute with the name add. add.
The complete attribute configuration in the metadata XML looks like this:The complete attribute configuration in metadata XML looks as follows:
<md:AttributeConsumingService index="1">
<md:ServiceName xml:lang="en">
nele.ai
</md:ServiceName>

<md:ServiceDescription xml:lang="en">
nele.ai SAML service provider
</md:ServiceDescription>

<md:RequestedAttribute
Name="http://schemas.microsoft.com/ws/2008/06/identity/claims/groups"
NameFormat="urn:oasis:names:tc:SAML:2.0:attrname-format:unspecified"
isRequired="false"
/>
</md:AttributeConsumingService>Name=” http://schemas.microsoft.com/ws/2008/06/identity/claims/groups”nameFormat="urn:oasis:names:tc:saml:2.0:attrname-format:unspecified”isRequired="false”
Configuring group transferGroup transfer configuration
Group memberships are not automatically transferred from Entra ID to nele.ai for all of a user's groups. Instead, you must explicitly define which groups should be transferred:Group memberships from Entra ID to nele.ai are not automatically transferred for all groups of a user. Instead, you must explicitly define which groups should be transferred:
Create groups in Entra ID:Create groups in Entra ID: First, create the desired groups in Microsoft Entra ID.Create groups in Entra ID: First create the desired groups in Microsoft Entra ID.
Assign users to groups:Assign users to groups: Assign the relevant users to the groups you have created.Assign users to groups: Assign the appropriate users to the created groups.
Assign groups to the nele.ai app:Assign groups to the nele.ai app: Navigate to your nele.ai SAML application in Entra ID and assign the groups that should be transferred to nele.ai. Only groups explicitly assigned to the app are included in the transfer.Assign groups to the nele.ai app: Navigate to your nele.ai SAML application in Entra ID and assign the groups to be transferred to nele.ai. Only groups that are explicitly assigned to the app are included in the transfer.
Transfer logic:Transfer logic: During login, only those groups assigned to both the user and the nele.ai app in Entra ID are transferred. Groups assigned only to the user, but not to the app, are not transferred.Transfer logic: When logging in, only the groups assigned to both the user and the NELE.ai app in Entra ID are transferred. Groups that are only assigned to the user, but not to the app, are not transferred.
This configuration gives you full control over which group memberships are shared with nele.ai.This configuration gives you full control over which group memberships are shared with nele.ai.

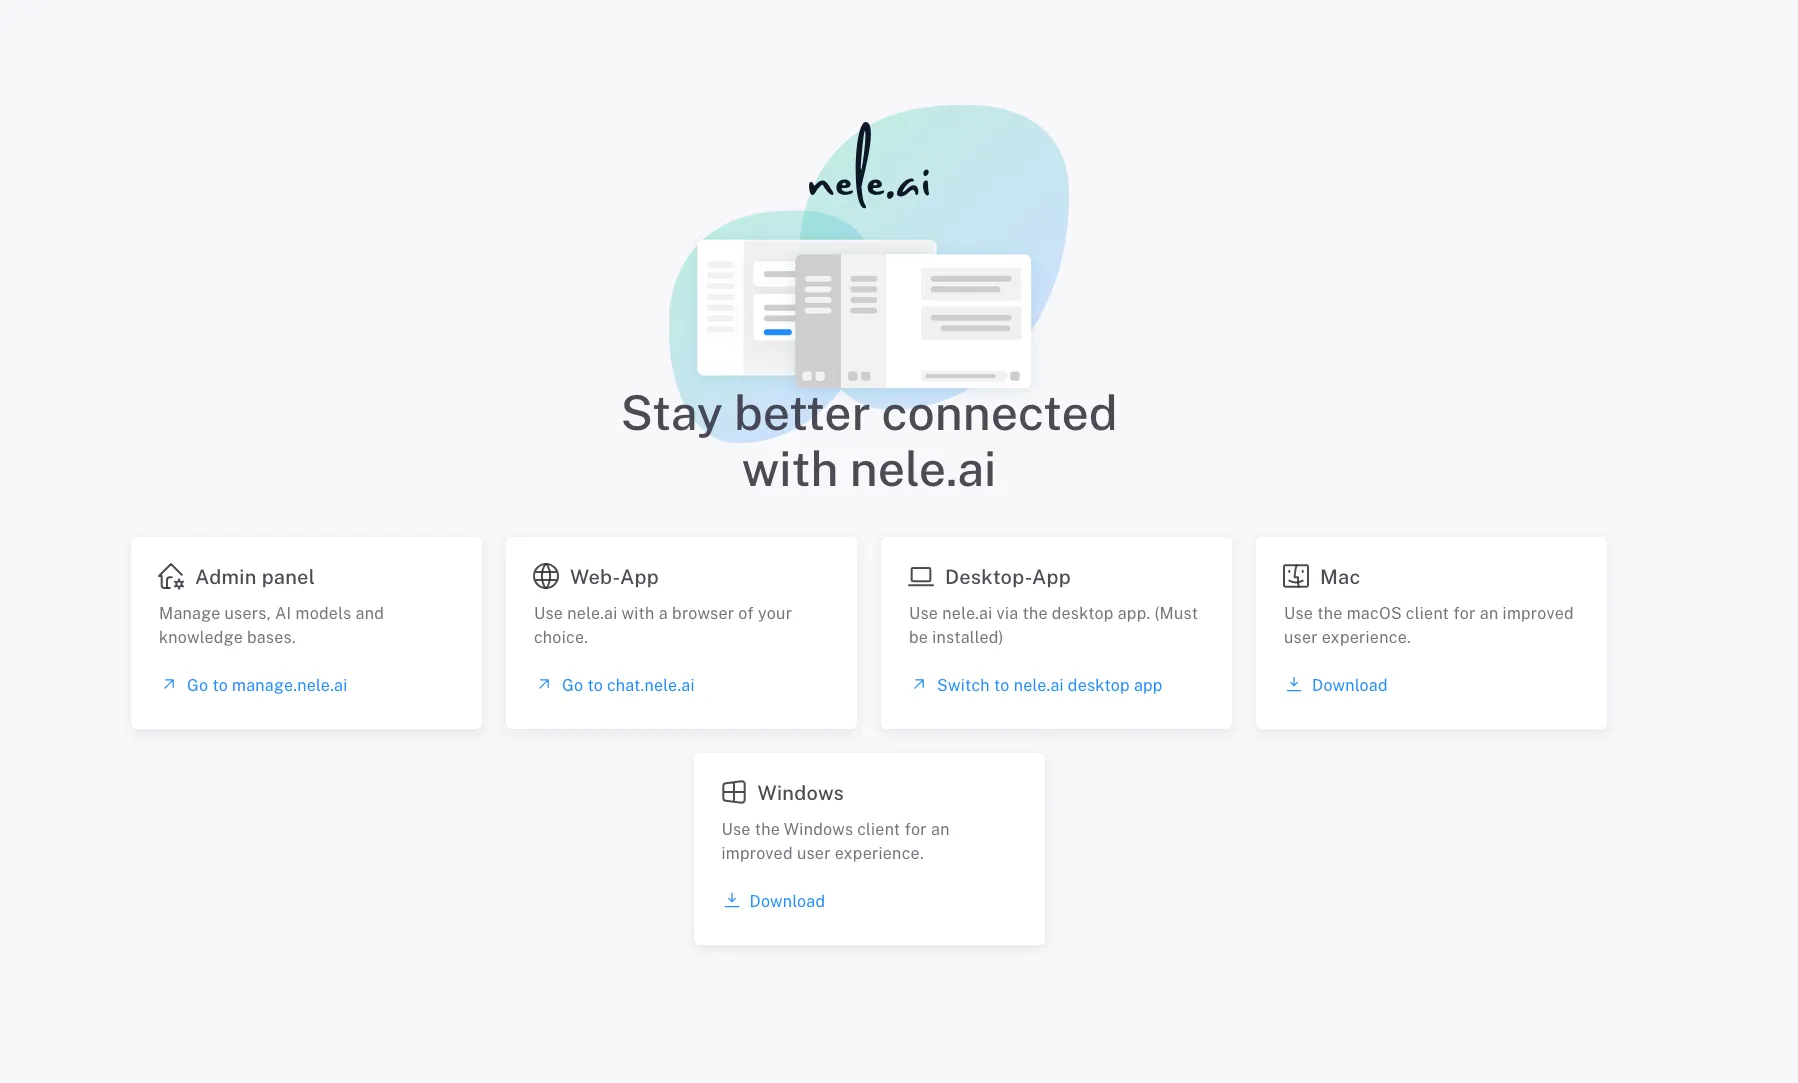
You can test a successful configuration via a link in the administration area. If everything is set up correctly, you will be redirected to an overview page where you can choose, among other things, whether you want to log in to the desktop app or the web app. Alternatively, you can download nele.ai for various operating systems there.You can test a successful configuration via a link in the administration area. If everything is set up correctly, you will be redirected to an overview page where you can choose, among other things, whether you want to log in to the desktop app or the web app. Alternatively, you can download nele.ai for various operating systems there.