Set up SSO with nele.ai
Setting up the SSO feature and member settings
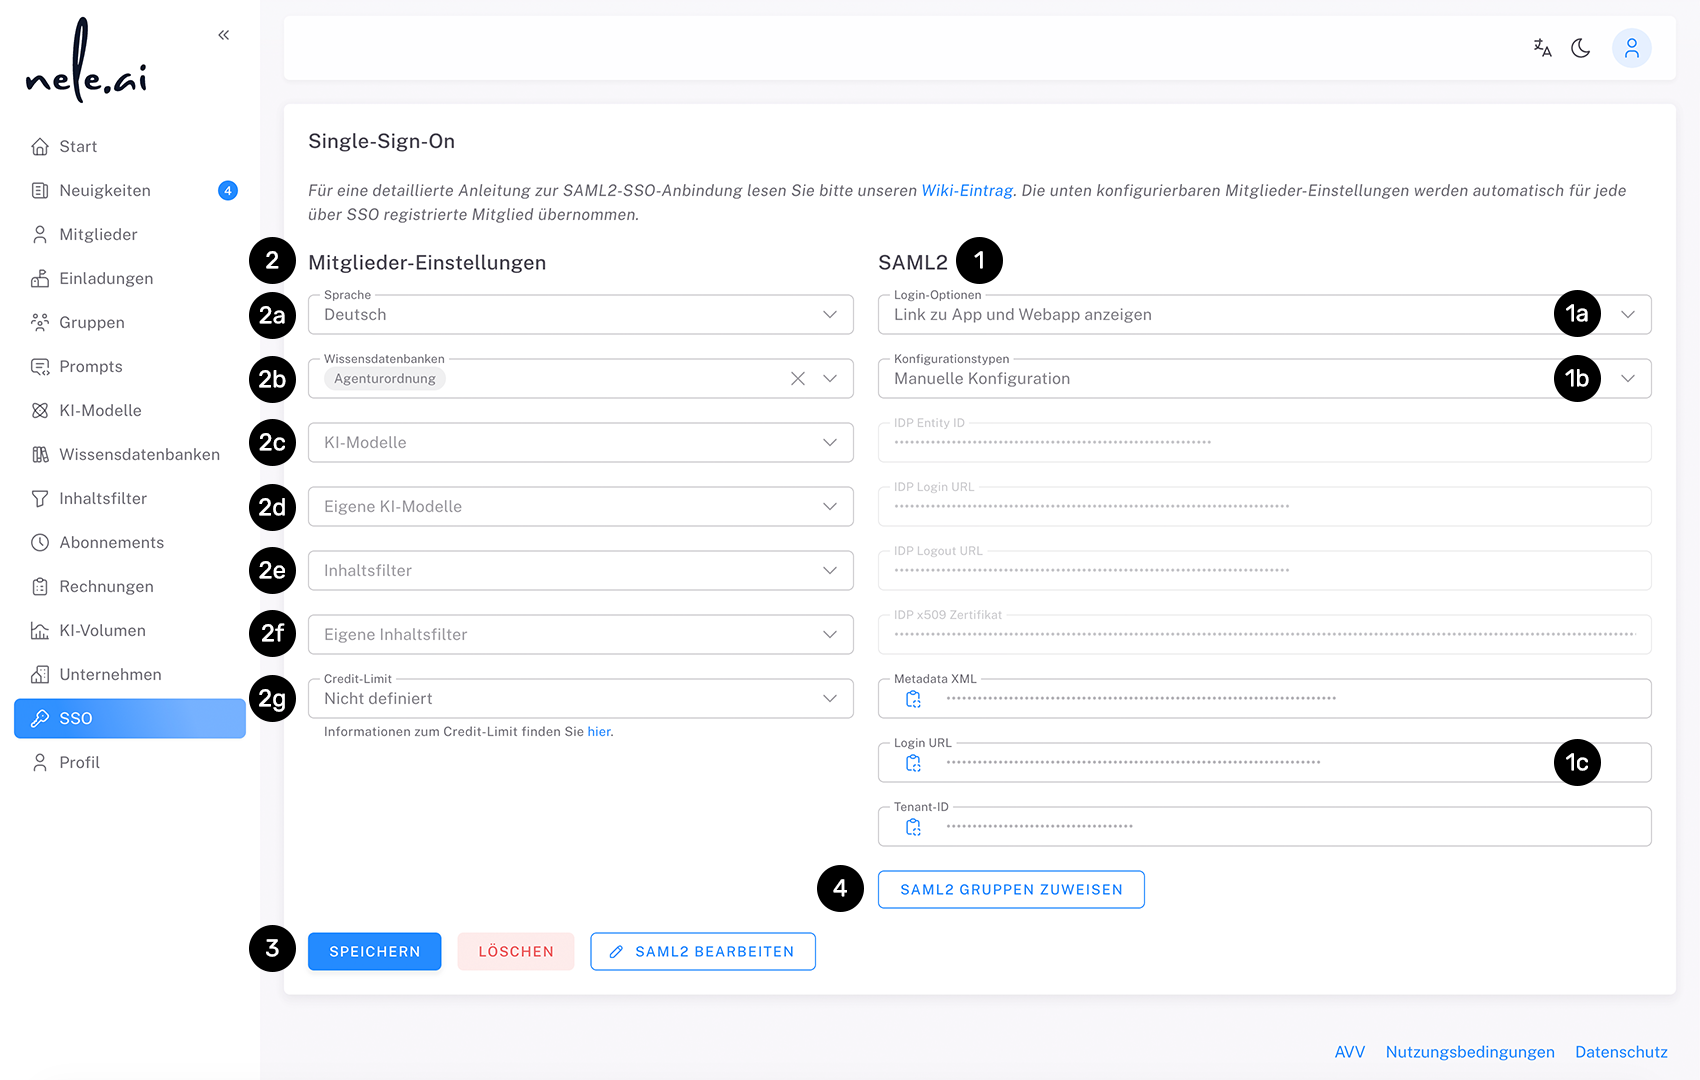
Follow the steps to set up the SSO connection by filling out the required fields with your SSO provider information. For detailed instructions on the SAML2 SSO connection, read our wiki entry.
Here you can set globally where the member should be redirected after a successful login. To do this, select “Login Options” in the selection field (1a) from the points “Show link to app and web app”, “Direct redirection to chat.nele.ai”, “Show link to app” and “Show link to web app only”.
Here are three ways to configure your SSO settings (1b). To do this, choose from the following points:
manual configuration
Enter the appropriate values in the corresponding fields below.
Configuration via metadata XML file
Reading the values from an external file.
Configuration via metadata XML URL
Recommended configuration type, as this allows your data to be updated even after the validity period has expired.
You can copy and share the login URL (1c) You can copy and share with members of your company using the icon on the input field. In future, your team members will be able to log into their nele.ai accounts via this URL using the SSO functionality.
After the general setup of the SSO feature is complete, you can make member settings, known as default settings (2). This includes their language (2a), assigned knowledge databases (2b), assigned AI models (2c), assigned own AI models (2d), assigned content filters (2e), assigned custom content filters (2f) and the monthly credit limit (2g)which should be available.
These are the default settings that members are automatically assigned when they log in to nele.ai for the first time via SSO links.
In addition, various SAML2 groups can be created in the SSO area, which are then assigned directly to the member when the member logs in via the specified SAML2 connection (4).
When you finish, click Save (3)to enable access to nele.ai via SSO or to save your member settings.
Adjusting user settings

You can adjust user settings in the SSO area at any time. If you change one or more of the values you have already set, you also have the following settings options:
After clicking on the save button, an overlay lists the adjustments you have made. Select the checkbox to the left of the respective entries (1) to adopt your adjustments globally for all existing and future users. If the checkbox is empty, your adjustment will only be applied to future users, but not to existing users.
Note that you need both SSO and user management rights to use this feature. If you only have SSO rights, adjustments to the user settings are made exclusively for future users, but not for existing users, and the described overlay does not appear.
Further individual settings for existing users can be made at any time at https://manage.nele.ai/users be carried out.
Finally, click “Assign to all users.” (2) to apply your changes.
Configuring SAML2 group assignments
In the SSO area, you can create various SAML2 groups, which are then assigned directly to the user when the user logs in via the specified SAML2 connection.
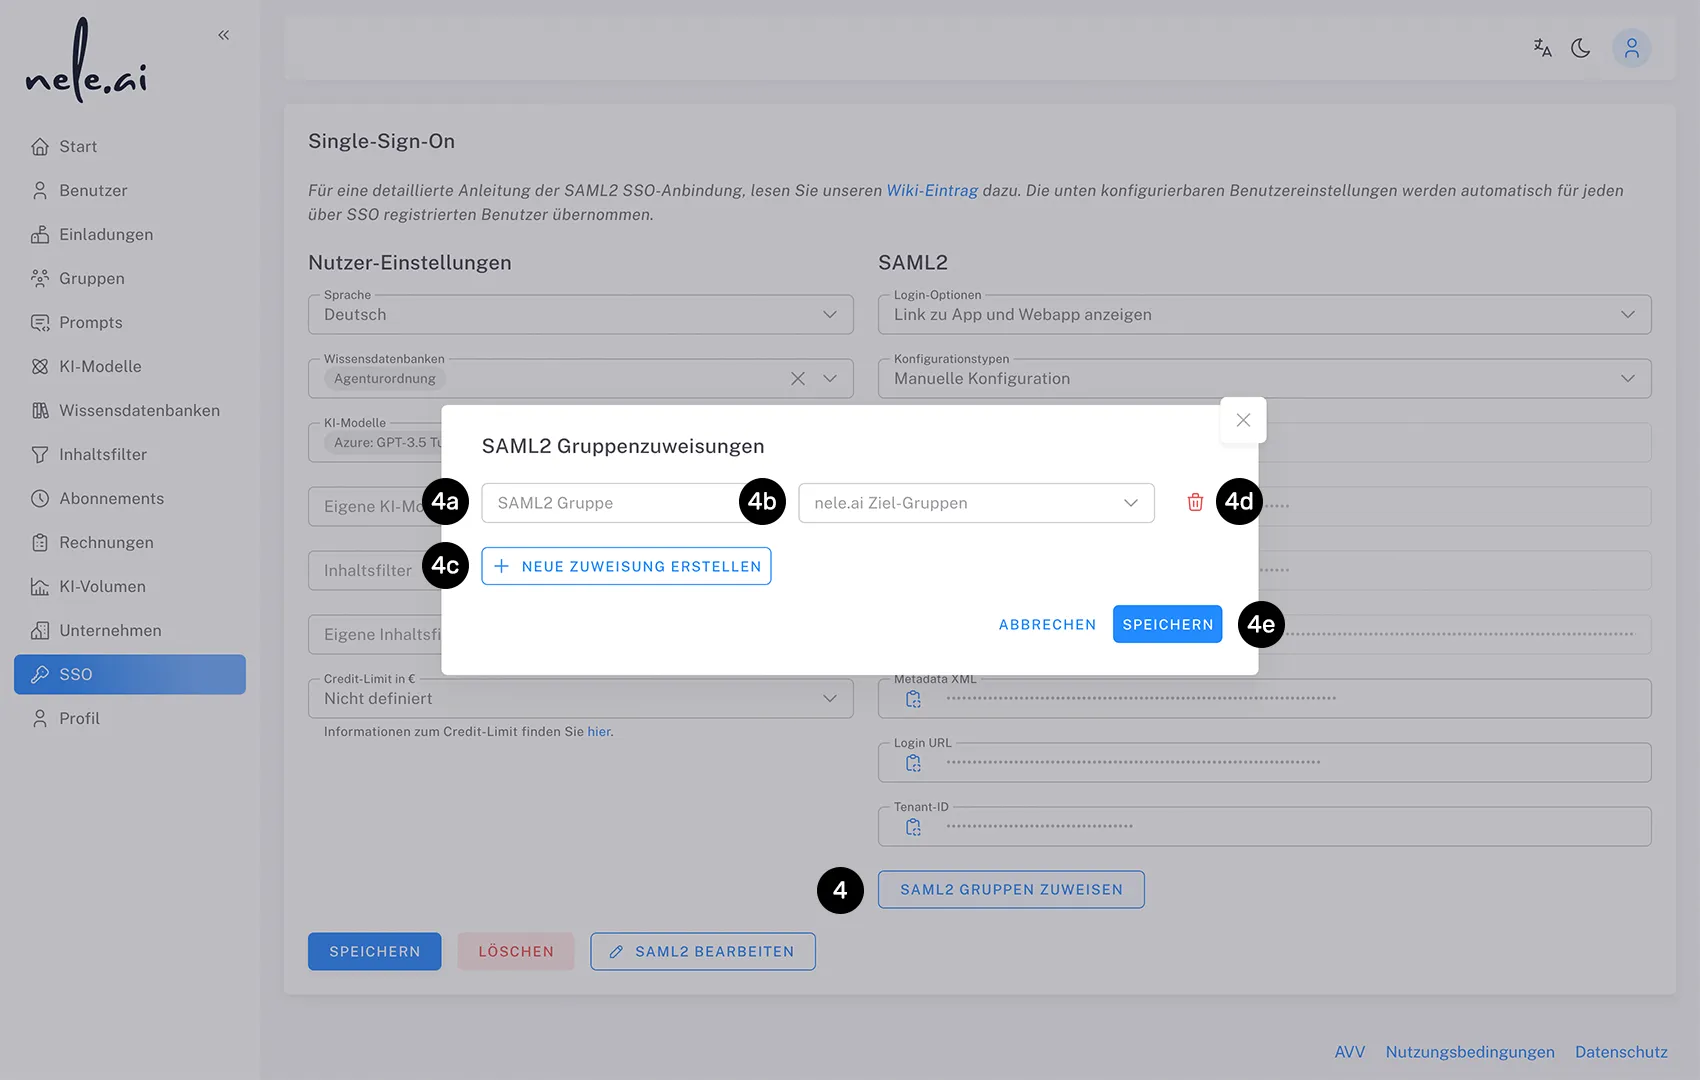
Click “Assign SAML2 Groups.” (4) to open the overlay for group assignments. Here you can assign existing SAML2 groups to nele.ai groups.
In the “SAML2 Group” input field (4a) Enter the name of the SAML2 group as transferred by your identity provider. In the drop-down menu “nele.ai target groups” (4b) In nele.ai, select the appropriate target group to which the users should automatically be assigned.
With “Create a new assignment” (4c) You can add more group assignments. Assignments that have already been created can be accessed via the trash can icon (4d) remove again.
When you're done, click “Save.” (4e) to activate your group assignments.