Provide company knowledge for AI models
Knowledge bases allow you to specifically expand the knowledge base of the AI models you use with your own company content. You can add and manage documents and individual websites and make them available to your team or selected members. The AI can then use this information as an additional basis for its responses.
Feature overview
Knowledge base overview
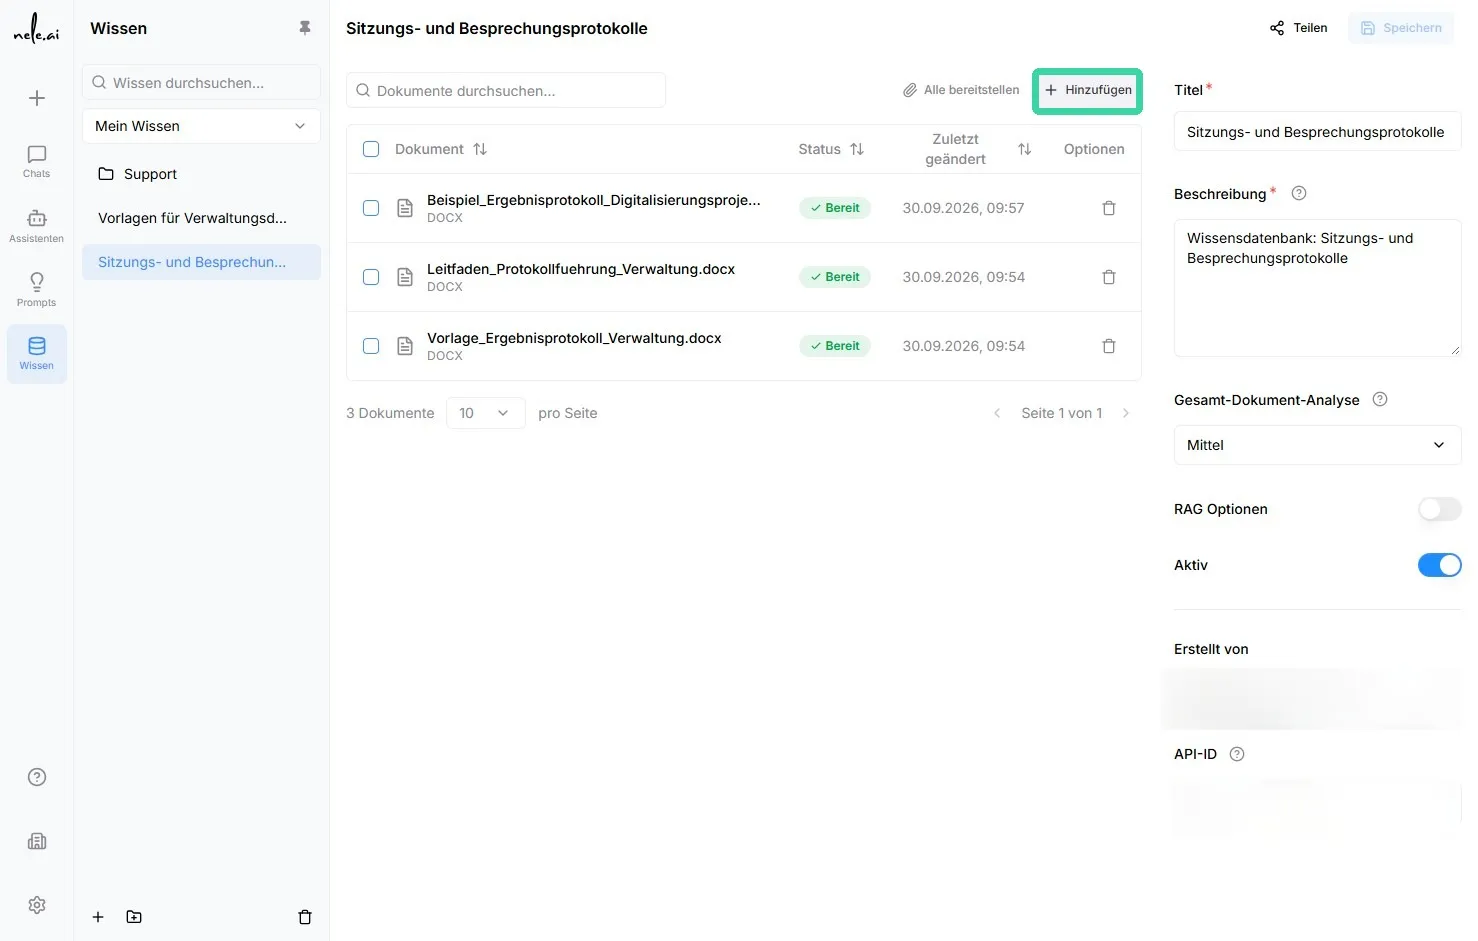
The knowledge base overview shows all created knowledge bases. This overview helps you quickly review and manage content and check its deployment status.
The following information is displayed for each knowledge base:
Displayed information
- Title
The title makes it easier to identify the knowledge base. Use a clear, unique name, such as "Sales Product Knowledge" or "HR Policies." - Description
The description provides a brief explanation of the content contained in the knowledge base and its intended purpose. - Documents
In the documents section, you can see your added documents along with their names and file types. - Status
Use the status selection to enable or disable a knowledge base. When enabling, you can specify whether the content should simply be published or also assigned directly to members or groups. - Actions
You can edit or delete the knowledge base using the available action buttons.
Understanding document status
The color next to the document count shows at a glance whether the content has been fully deployed:
- Green:All included documents and websites are deployed.
- Orange:At least one entry is still in "Draft" status.
- Red:No documents or websites have been added to the knowledge base yet.
Note: Publishing and assignment
A published knowledge base is available within the company. To allow specific individuals or groups to use it, it must also be assigned to the relevant members or groups.
Create new knowledge base
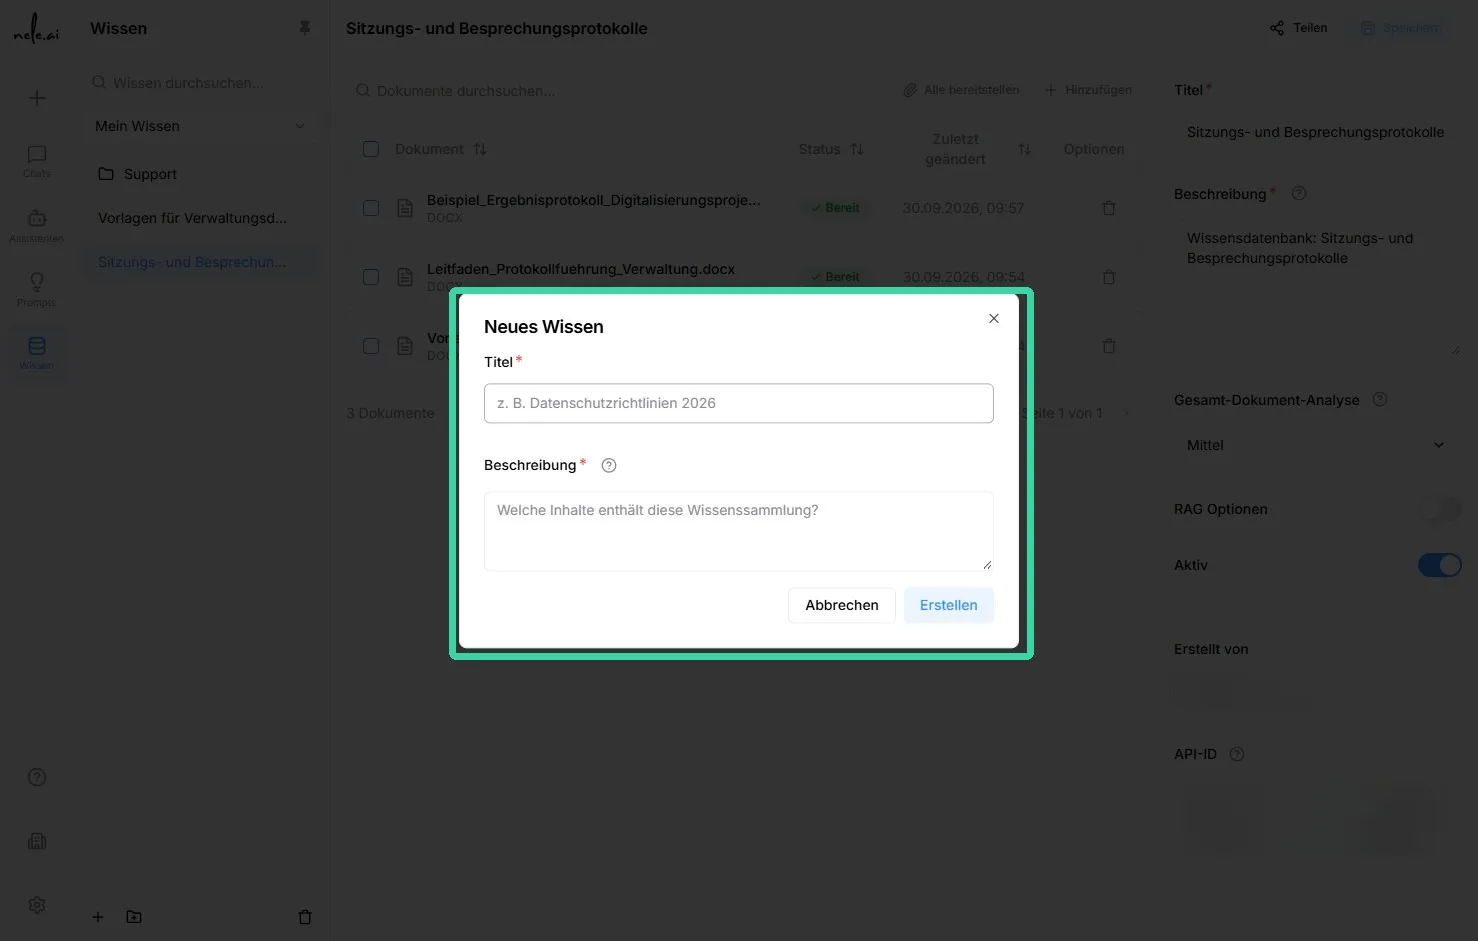
Create a knowledge base before you can add documents or websites.
How to proceed
- Open the knowledge base overview.
- Click onNew knowledge.
- Enter a meaningfulTitlein.
- Add a briefDescription.
The description is used for the automatic selection of knowledge. - Click onSave.
After saving, the document management view for the newly created knowledge base will open. There, you can add files and webpages.
Meaningful titles and descriptions
Choose names that clearly indicate the content. This helps others find the right knowledge base more quickly.
Tip: Formulate descriptions effectively
Briefly describe the topic, content, and intended purpose. A good description might be: "Contains current price lists, service descriptions, and contract information for sales."
Managing documents and webpages
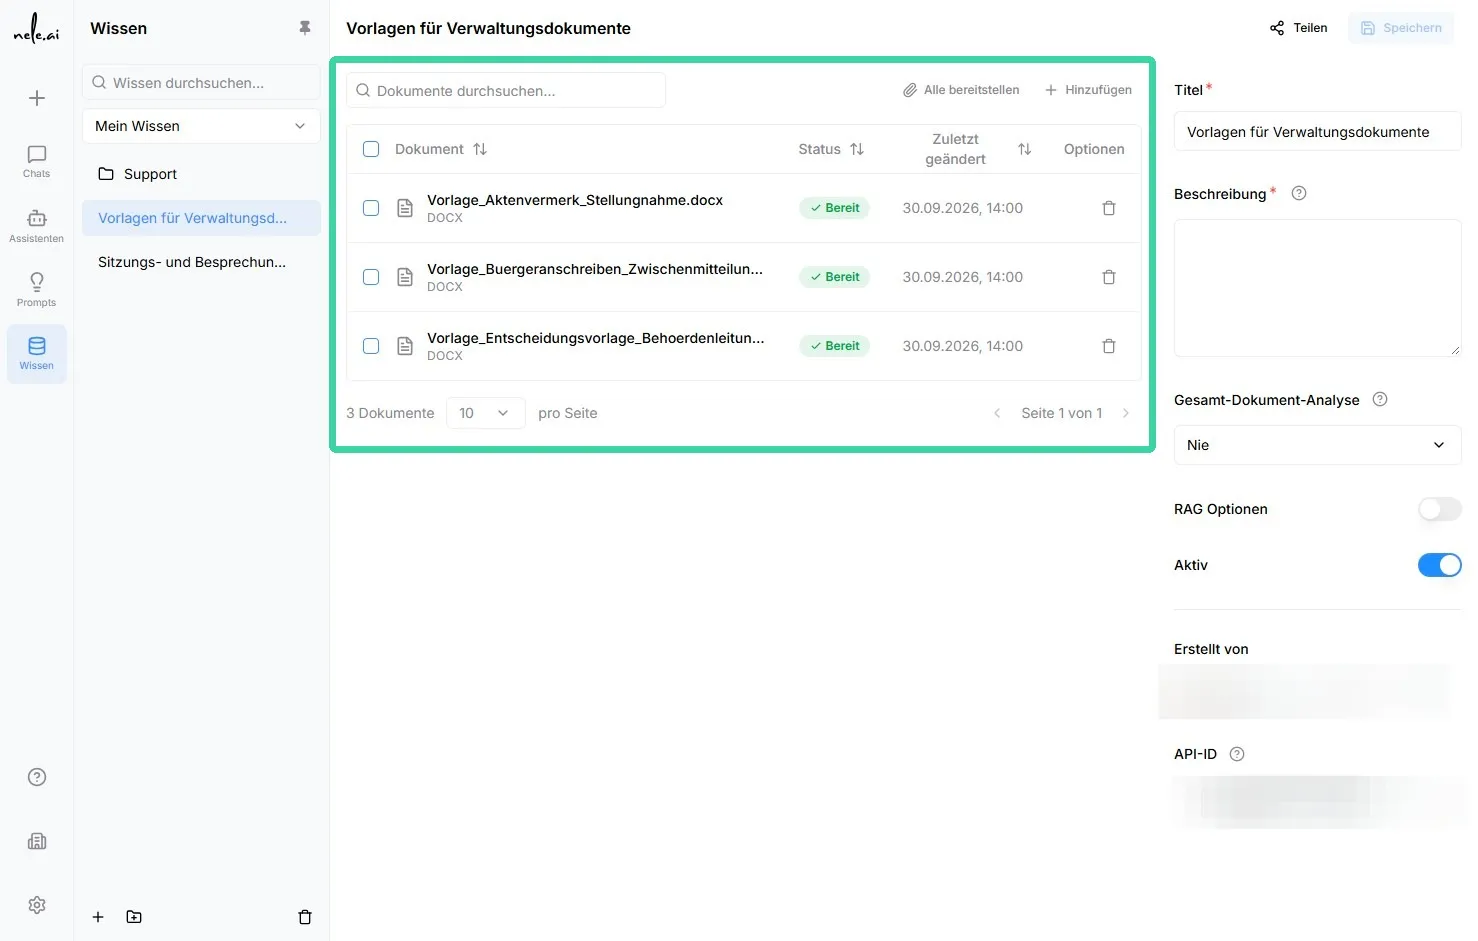
In the detail view of a knowledge base, you can manage all stored content. Here, you can see both uploaded files and integrated webpages.
Document management features
- Search
Use the search function to quickly find existing documents or webpages. Once you enter a search term, only matching entries will be displayed. - "Documents" section
Uploaded files and webpages are listed here. - Status
The status indicates whether an entry is still a draft or has already been published. - Last modified
This date shows you when a document or webpage was last edited or updated. - Delete
Entries that are no longer needed can be removed via theDeletebe removed from the knowledge base. - Share all
Use this button to publish all included documents and webpages at once. - Add documents
Use this button to add new files or web pages.
Important: Drafts are not yet active*
Always check the status after adding new content. Only published documents and web pages are available for use in the knowledge base.*
Add documents
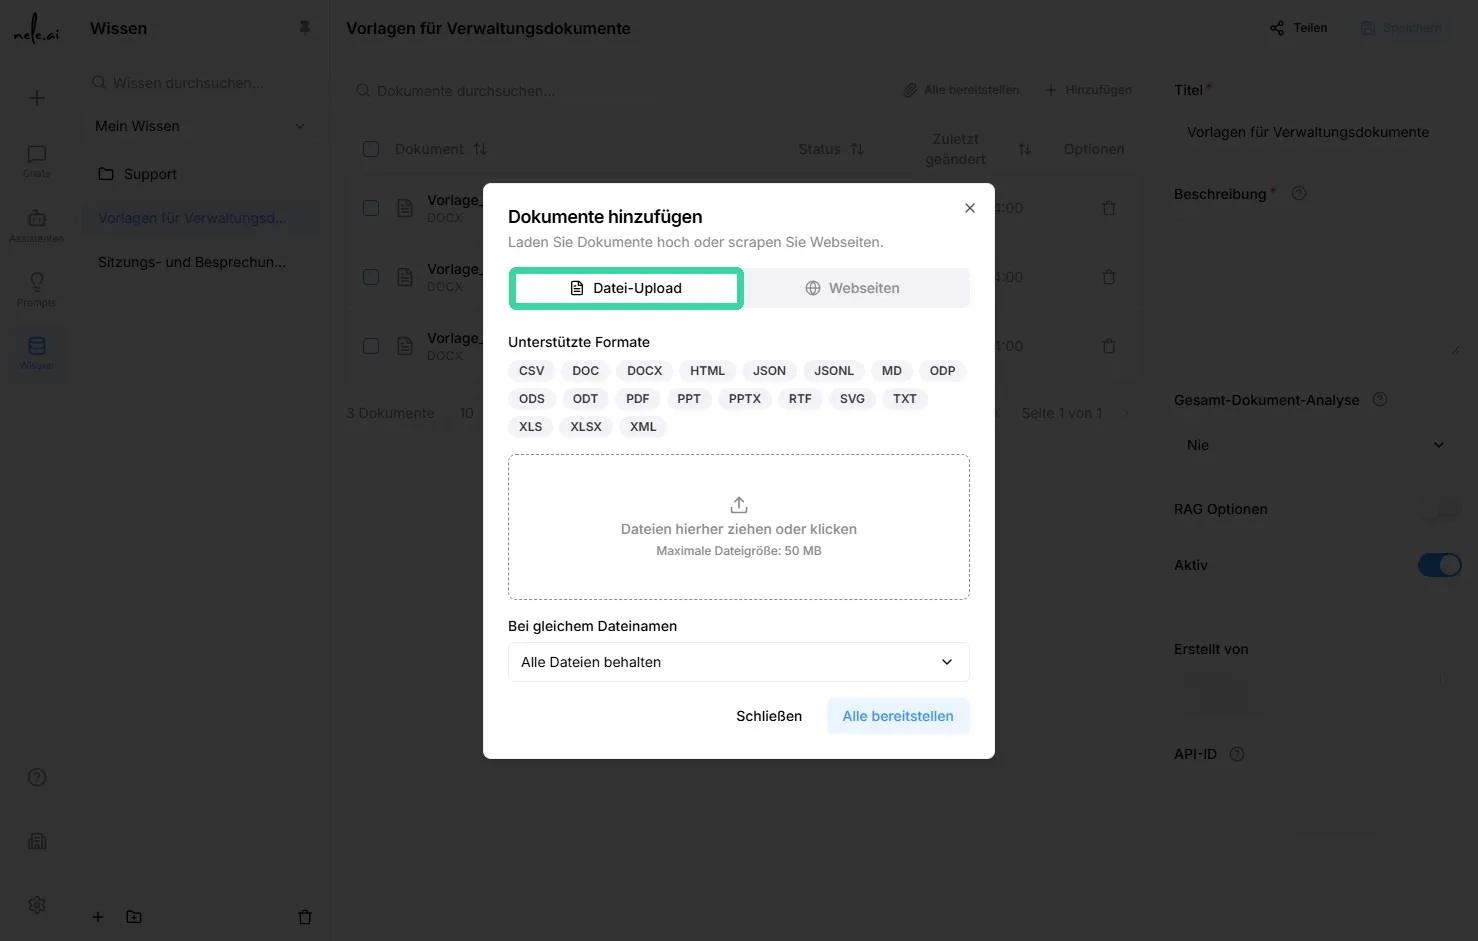
Use Add documents to upload files to the knowledge base. You can see which file formats are supported directly in the upload area.
How to upload a file
- Open the desired knowledge base.
- Click onAdd documents.
- Select the option to upload files.
- Select one or more files from your device.
- Confirm the upload.
- Check the status of the document after processing.
- Publish the document when it is ready to be used.
Note: Check content before uploading
Please upload only current, professionally verified content that is suitable for AI use. Outdated or contradictory documents can lead to unclear answers.
Notes on allowed file types and file size
The file size must not exceed 50 MB
Allowed file types: CSV, DOC, DOCX, HTML, JSON, JSONL, MD, ODP, ODS, ODT, PDF, PPT, PPTX, RTF, SVG, TXT, XLS, XLSX, XML
"If file name exists" function
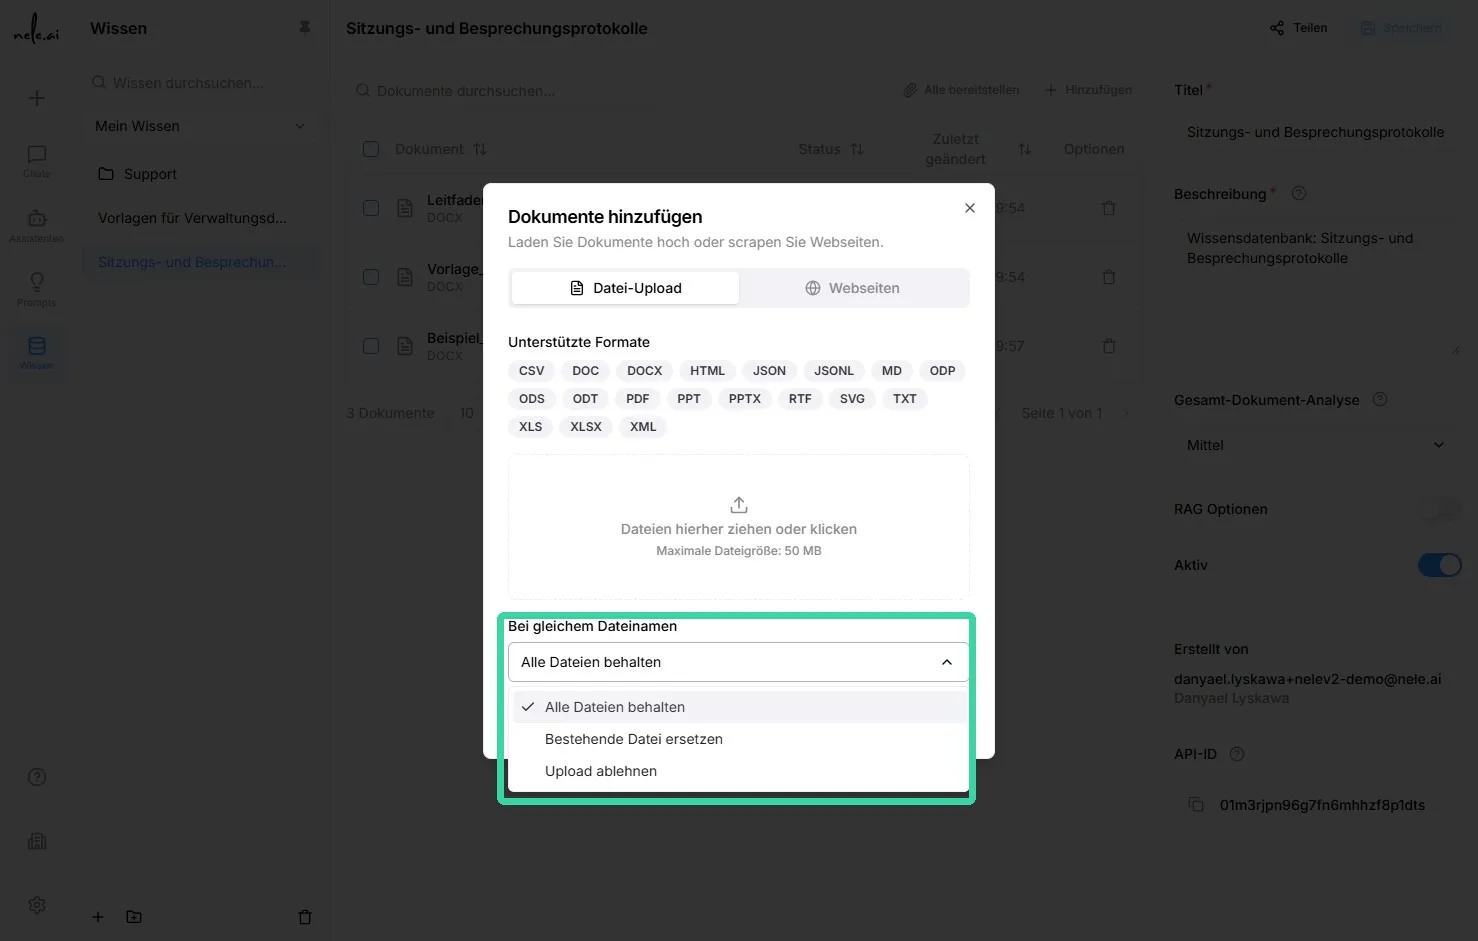
Under the "If file name exists" section, you can determine how to handle files that have the same name. The following options are available:
- Keep all files:This option uploads all files.
- Replace existing file:Files with the same name will be replaced.
- Reject upload:Uploads of files with the same name will be rejected.
Add websites
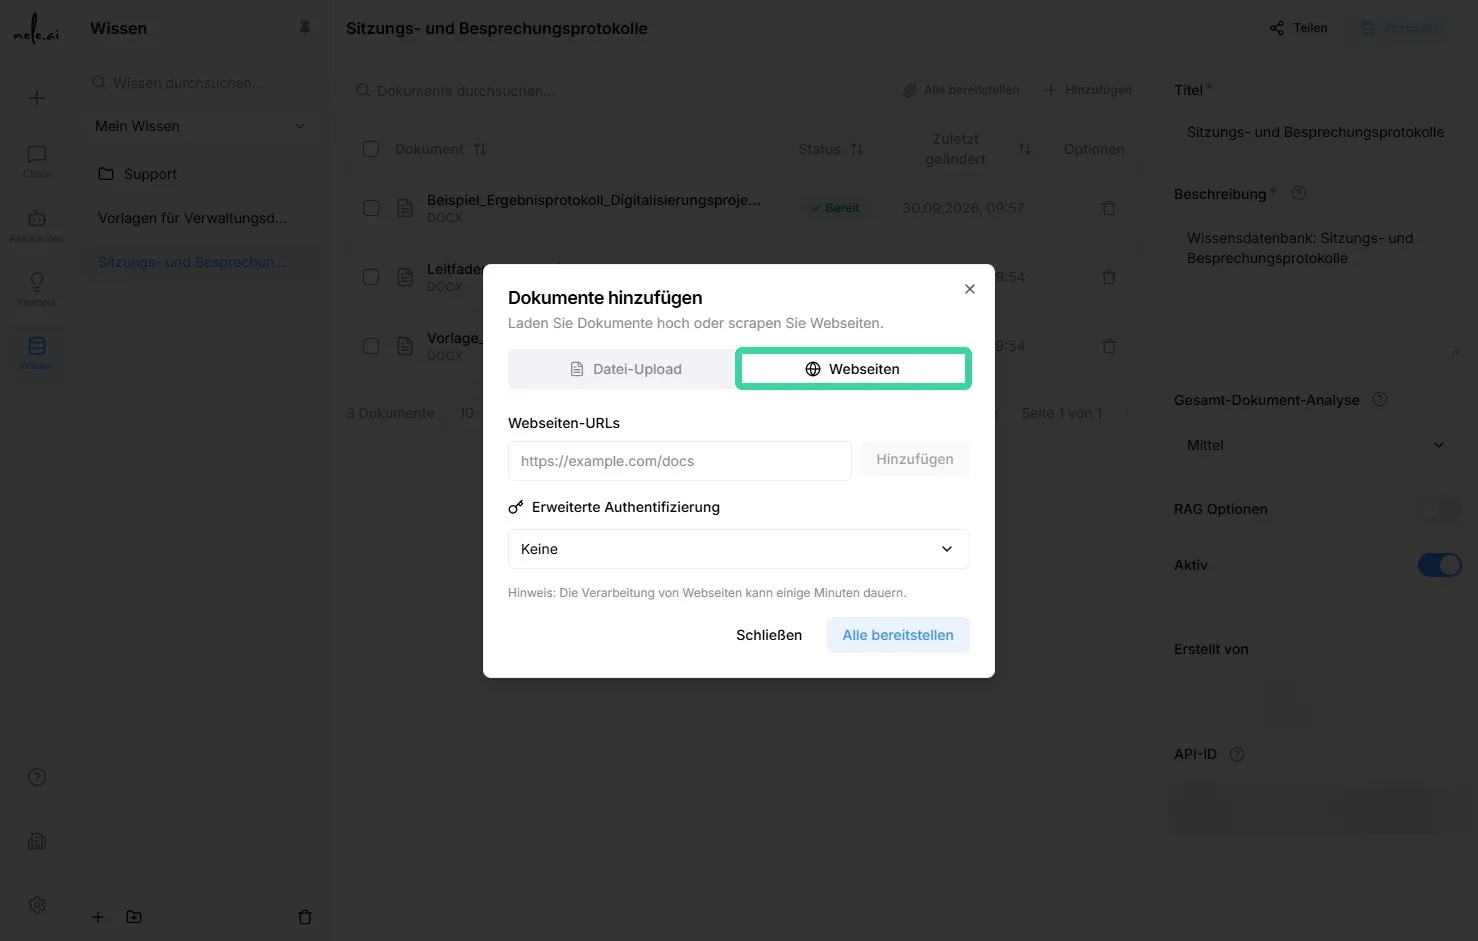
In addition to files, you can also include content from individual websites in a knowledge base. Only the specified URL area is read—not the entire website automatically.
How to integrate a website
- Open the desired knowledge base.
- Click onAdd documents.
- Go to the sectionWebsites.
- Enter the full URL of the desired website into the fieldWebsitein.
- Confirm your entry by clicking the plus icon or pressing Enter.
- Select the appropriate authentication method if required.
- Click onAdd.
- Wait until the processing status appears in the document overview.
- Publish the website once it has been successfully processed.
Authentication for protected websites
If a website is publicly accessible, select None for authentication.
Depending on the website, various methods are available for protected content:
- Basic:Use this option for websites that require a username and password.
- Bearer:Use this option if access is granted via a bearer token.
- Custom:Use this setting for other authentication methods, provided the required credentials are known.
Note: Include only the specified webpage area
If you enter a single subpage, only that specific page will be included. If you would like to include additional subpages, please add them as separate URLs.
Deploy and assign content
After uploading or integrating, documents and webpages may initially be in Draft status. Review the content and then deploy it.
Deployment options
- Share individual content:Share only specific documents or webpages as needed.
- Share all content:UseShare all, to share all entries in a knowledge base at once.
- Publish knowledge base:Make the knowledge base available within the company.
- Assign to members or groups:You can now easily share databases with individual users or entire groups using the share function.
Tip: Manage access rights systematically*
Whenever possible, assign knowledge bases to groups rather than many individual users. This simplifies management, especially when team members change or new employees join.*