Managing your chats with nele.ai
In this section, we will show you how to interact with the nele.ai chat function simply and efficiently. You will learn how to create a new chat, as well as how to delete, sort, move, and rename your chats.In this section, we'll show you how to interact easily and efficiently using the Nele.ai chat feature. You'll learn how to create a new chat, delete, sort, move chats to folders, and rename chats.
Feature overviewFeature overview
Identifying chats and foldersIdentifying chats and folders
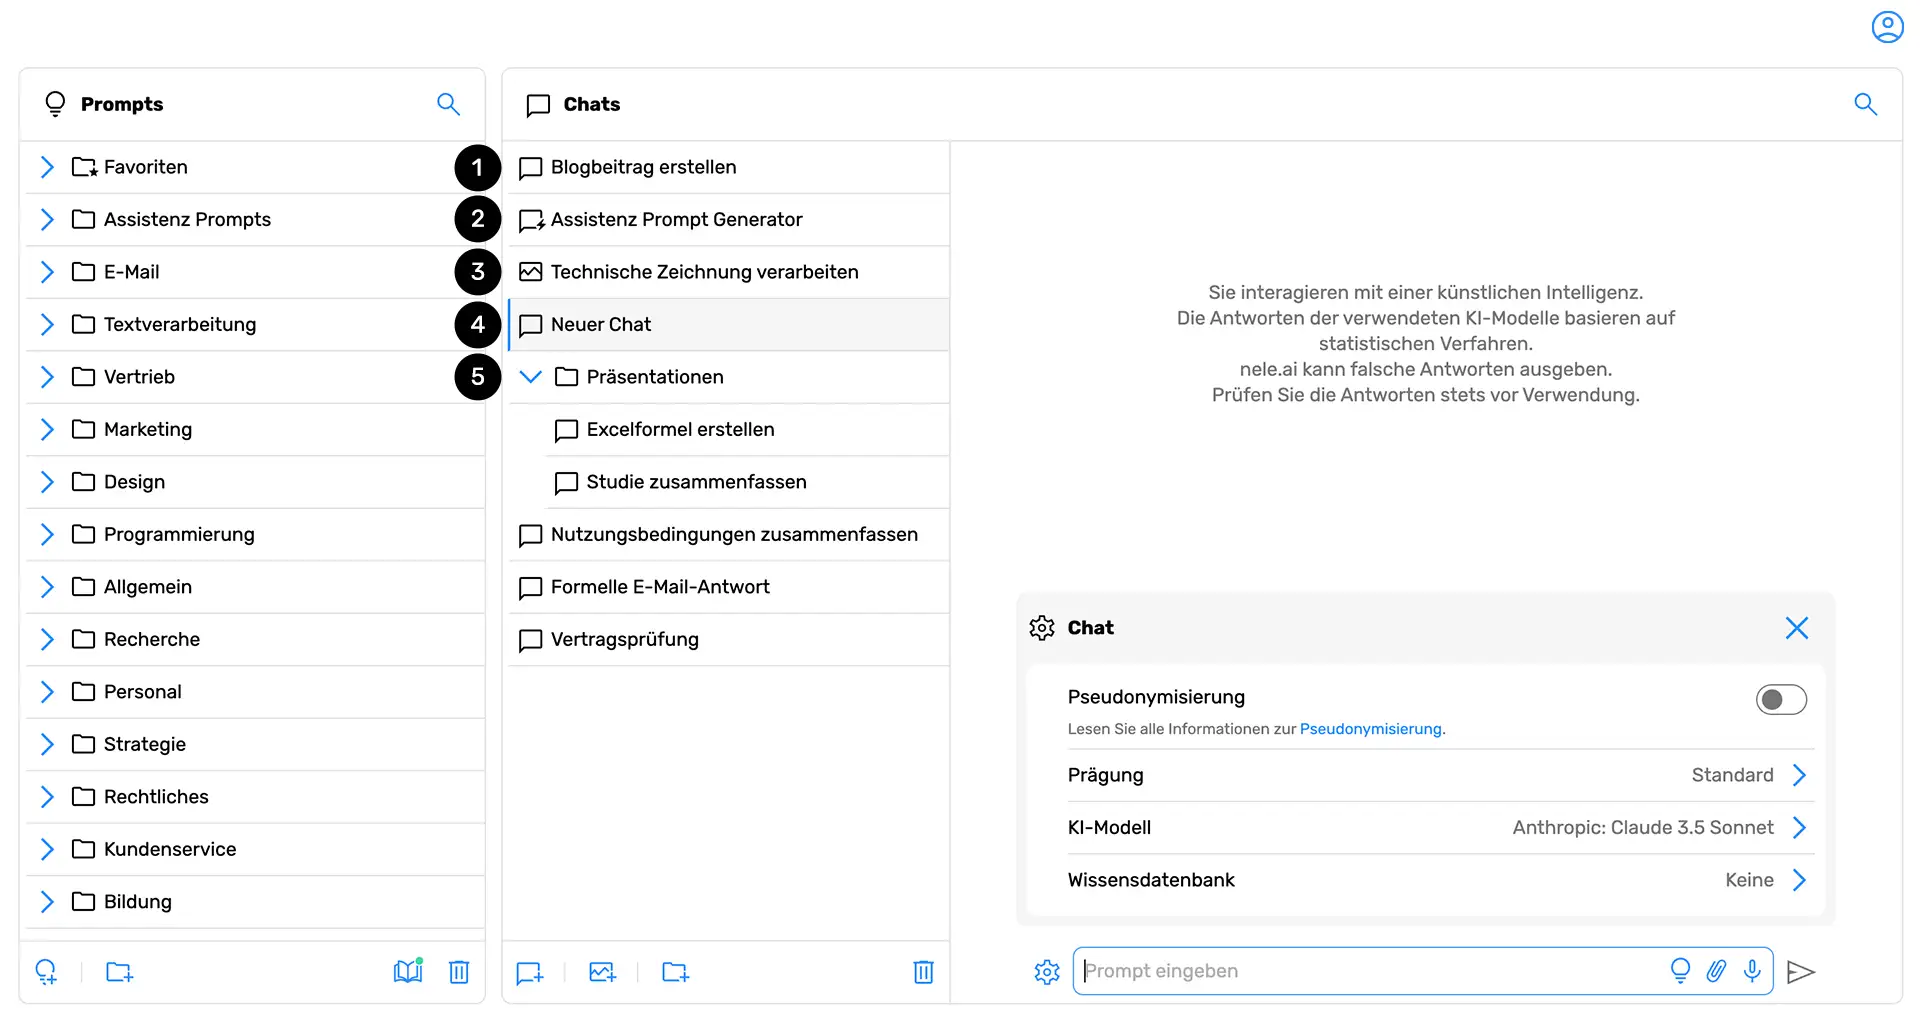
Your chats with the AI are listed in the "chat tree," which is located within the "chat overview."Your conversations with the AI are listed in the so-called "chat tree," which is located within the "Chat Overview".
A chat is identified by a speech bubble icon (1). If the chat contains an assistant prompt, the speech bubble icon is supplemented by a small lightning bolt (2).A chat is indicated by a speech bubble icon (1). If it's a chat that contains an assistant prompt, the speech bubble icon is supplemented with a small lightning bolt (2).
A special type of chat is the image chat, used for generating images. These are identified by the portrait icon in front of the chat name (3).A special type of chat is image chats, where images are generated. These are marked by a portrait icon before the chat name (3).
An active, i.e., currently open, chat is highlighted in color (4).An active chat, meaning one that's currently open, is highlighted in color (4).
Chats can also be sorted and organized into folders (5). You can learn how this works in this sectionthis section.Chats can also be sorted and organized in folders (5). How this works is explained in
Creating a chatCreate a chat
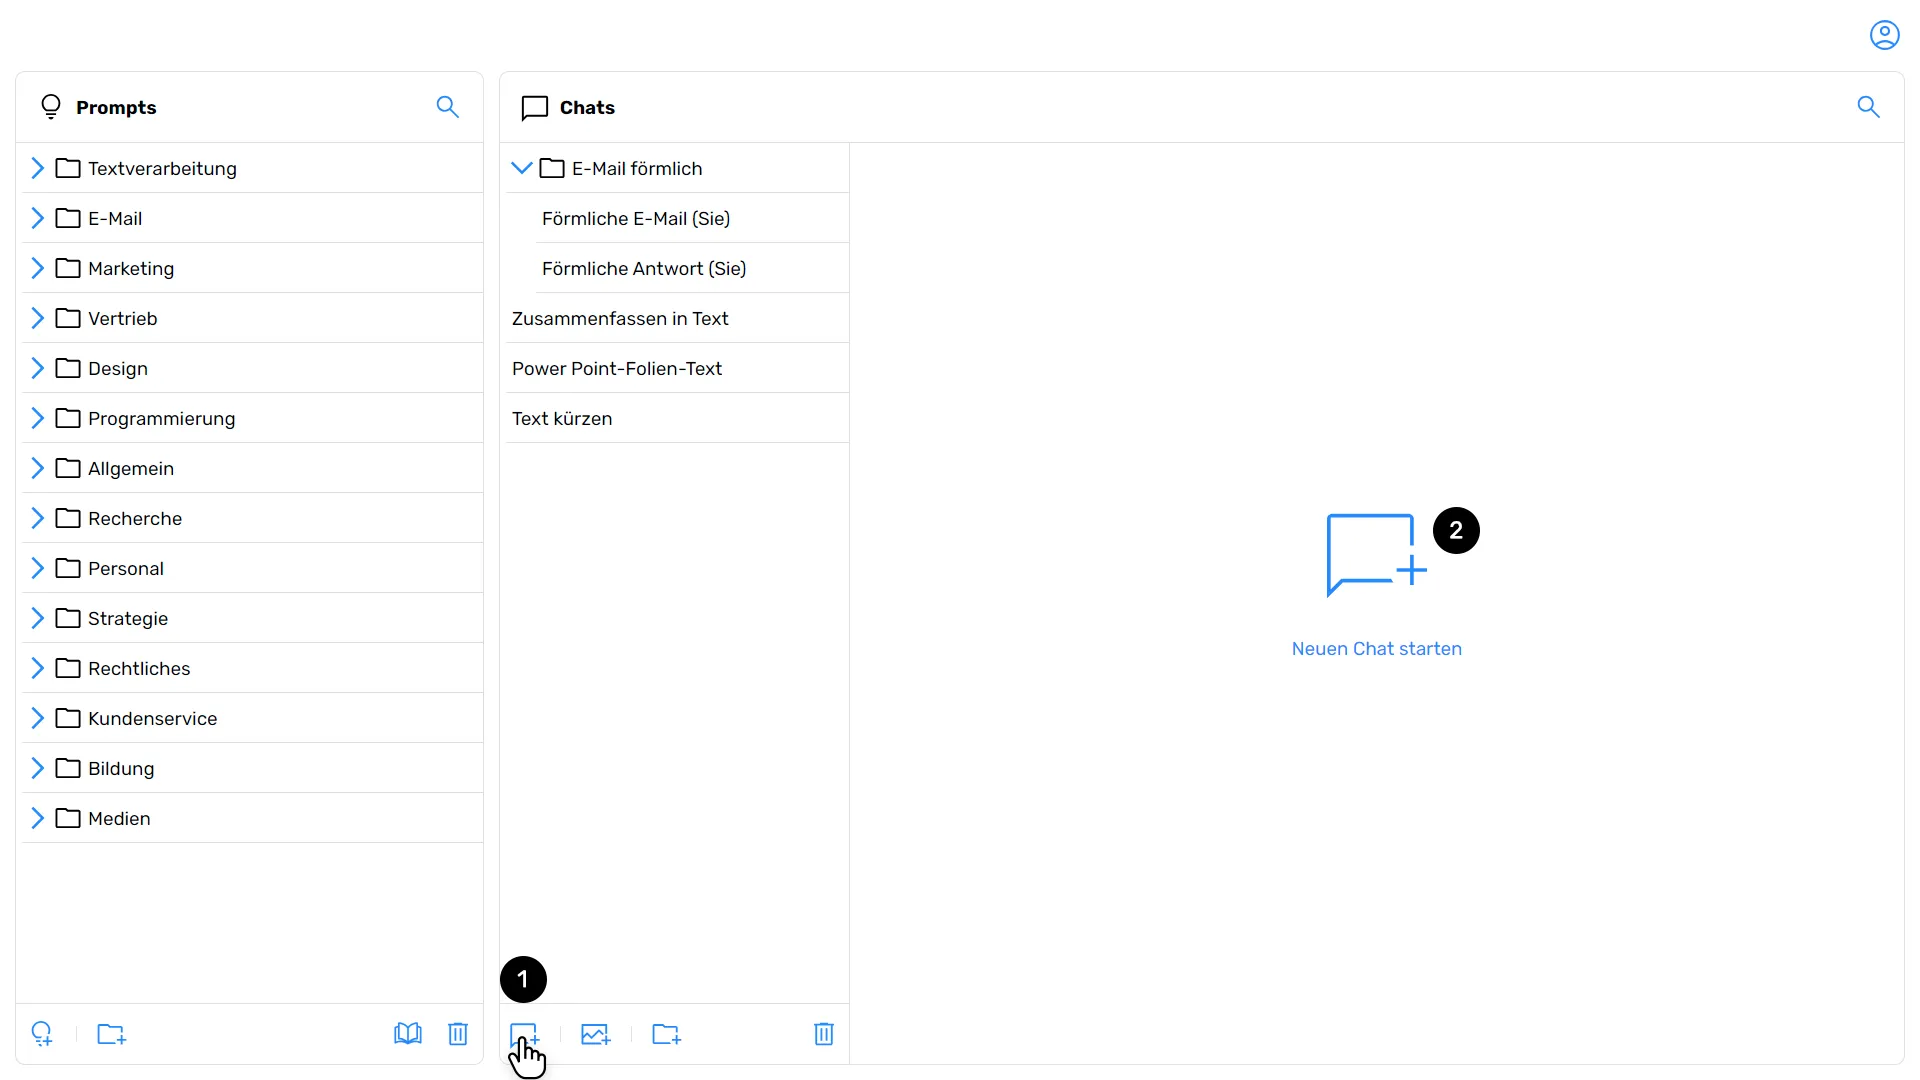
In the chat overview, click the icon for a new chat (1), represented by a speech bubble with a plus sign. Alternatively, if no chat is open, you can click the "Start new chat" button (2) within the chat window. A new chat window will open.In the chat overview, click on the new chat icon , which is represented by a speech bubble with a plus sign. Alternatively, if no chat is open, you can click on the “Start a new chat” button within the chat window click. A new chat window opens.
Creating an image chatCreate a picture chat
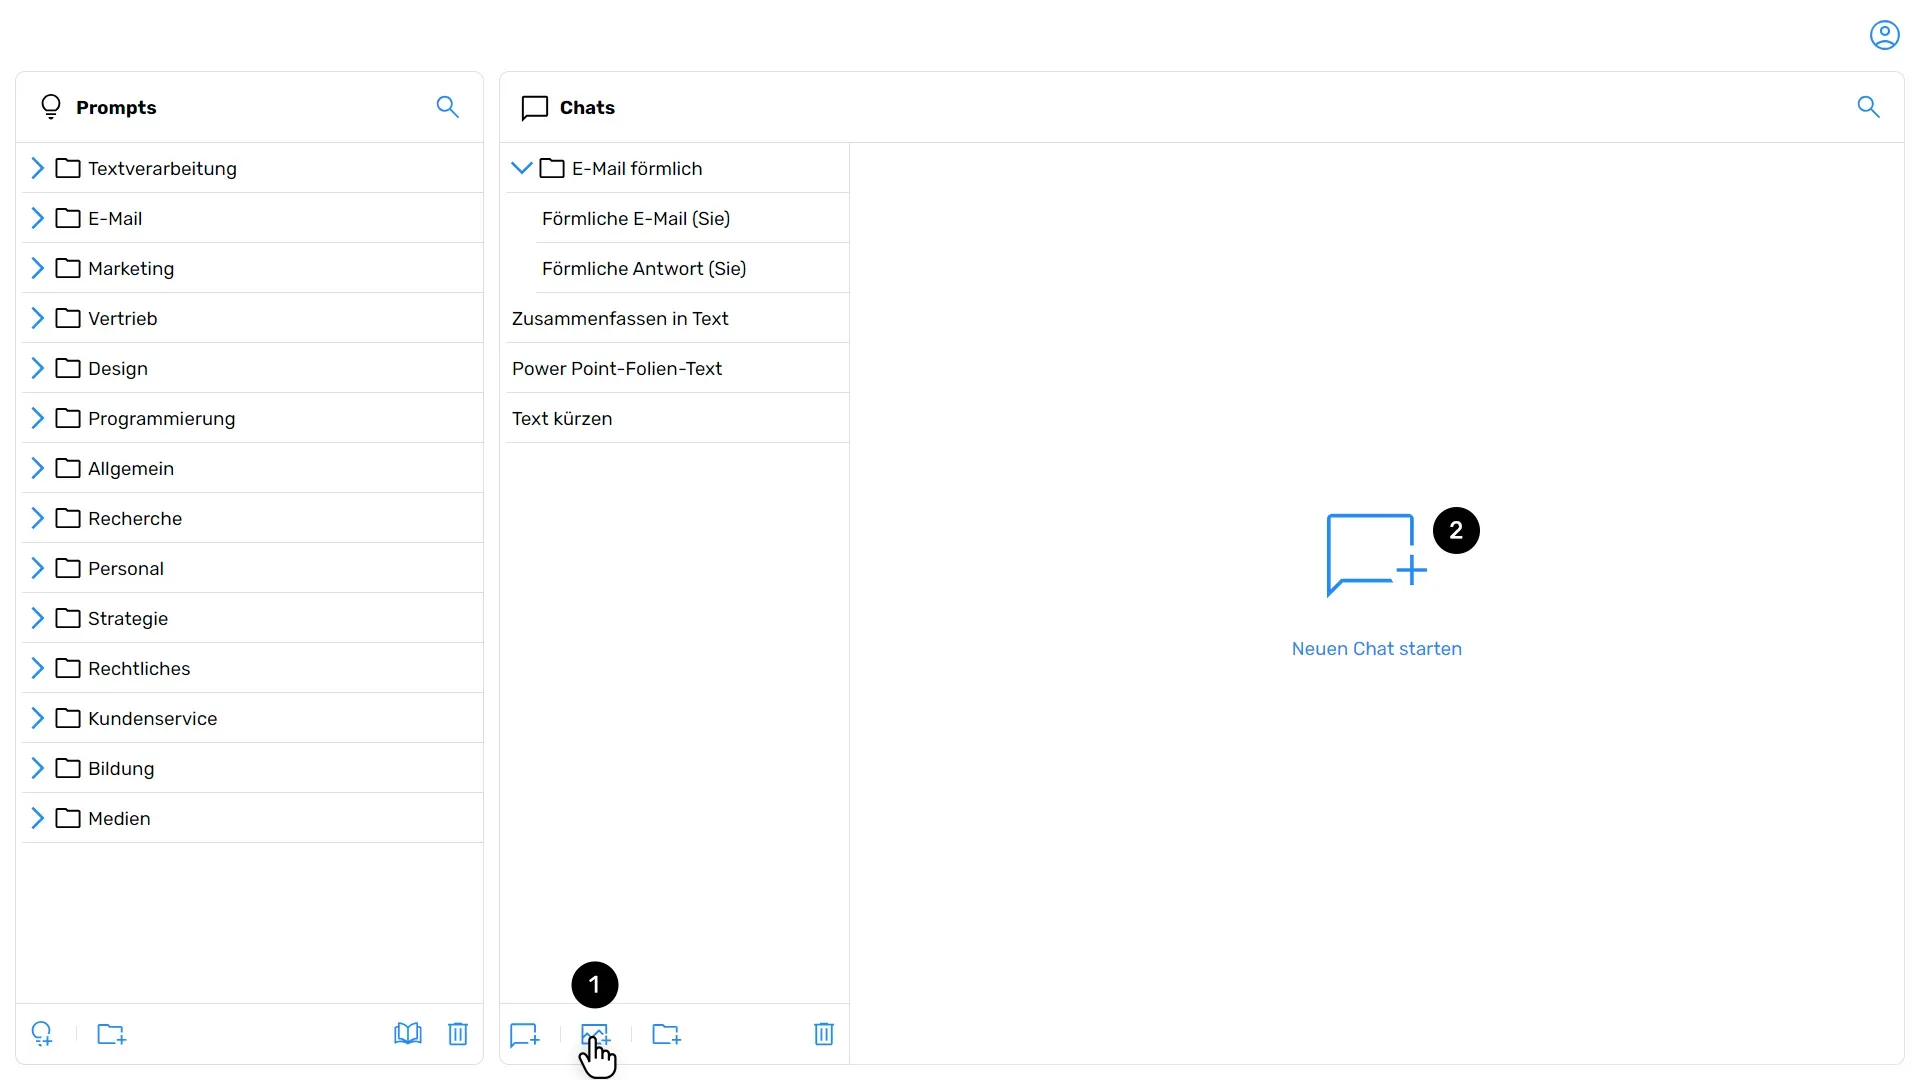
In the chat overview, click the icon for a new image chat (1), represented by a portrait icon with a plus sign. Alternatively, if no chat is open, you can click the "Start new image chat" button (2) within the chat window. A new image chat window will open, where you can generate images using the appropriate AI models.In the chat overview, click on the icon for a new picture chat , which is represented by a portrait icon with a plus sign. Alternatively, if no chat is open, you can click on the “Start new picture chat” button within the chat window click. A new image chat window opens, in which you can generate images using appropriate AI models.
Deleting a chatDelete a chat
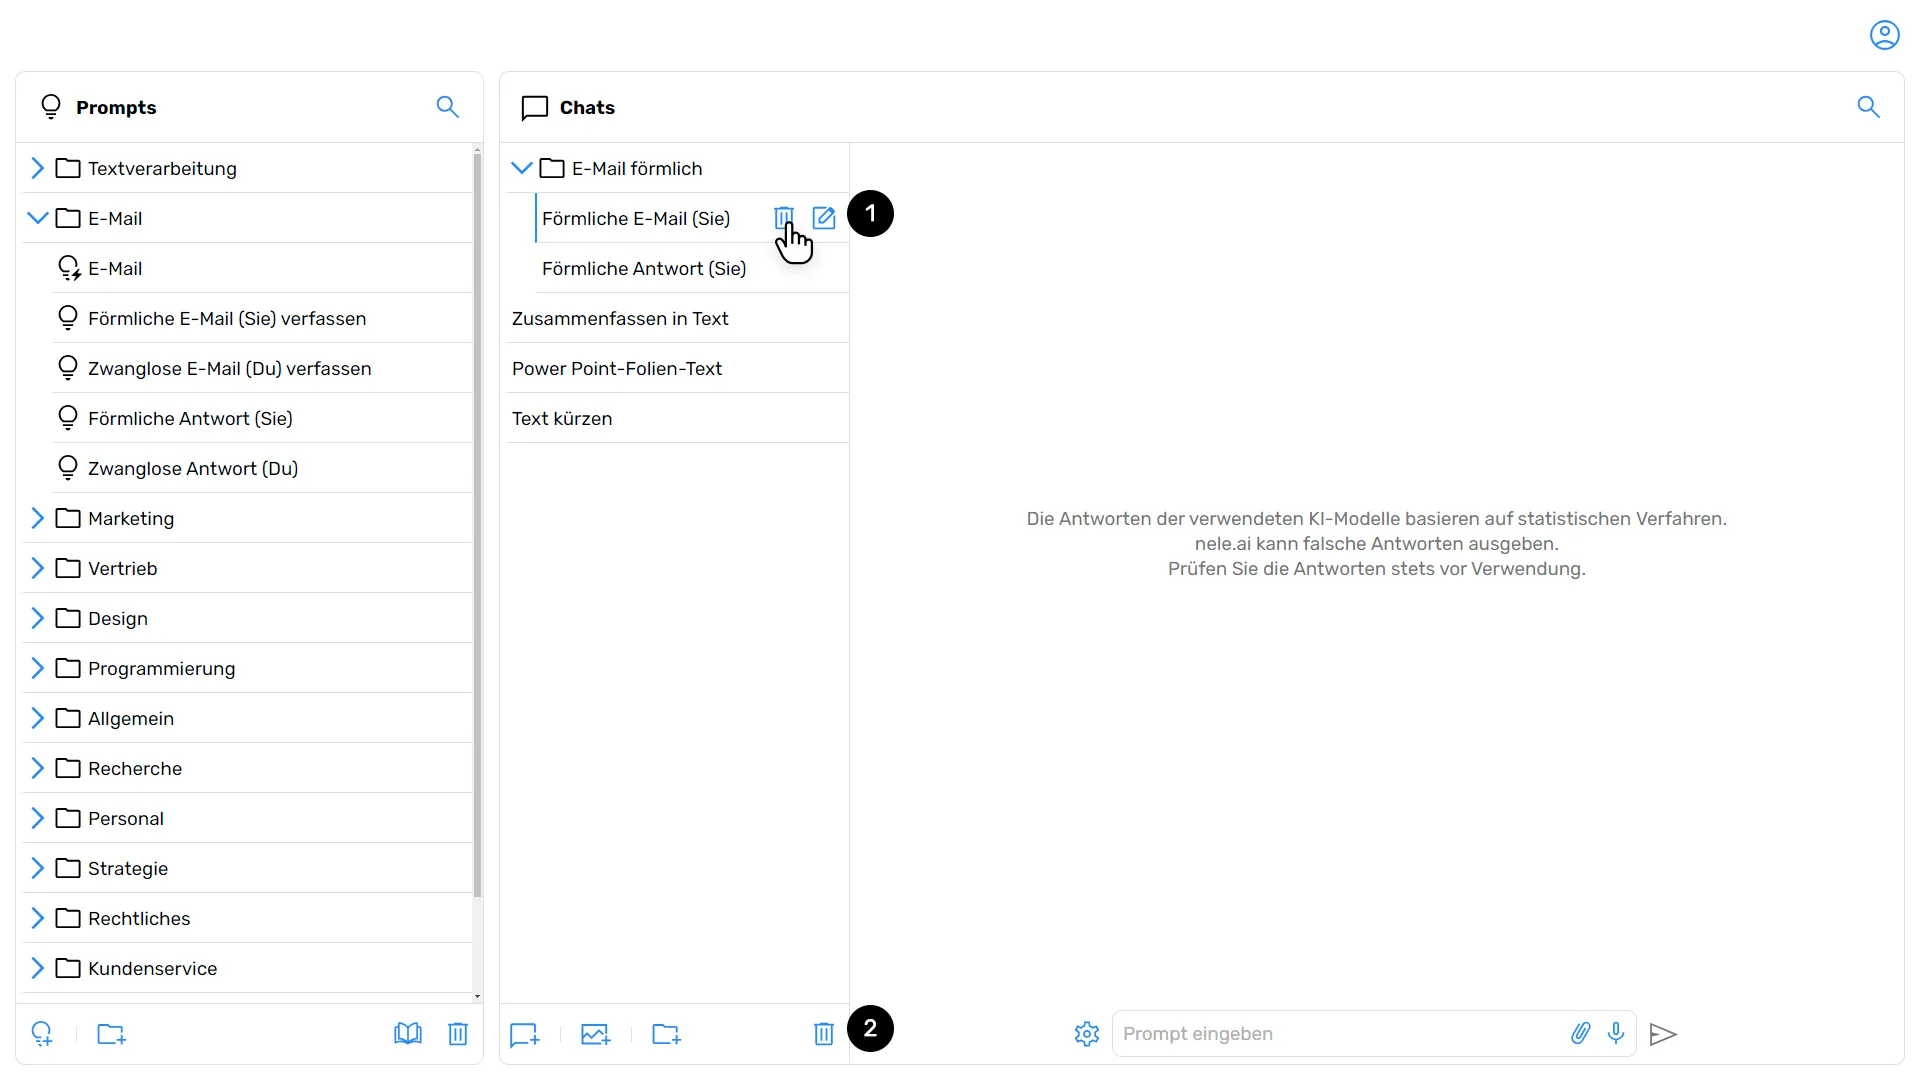
In the chat overview, select the chat you want to delete. Then, tap the "Trash" menu icon (1) or (2) to make a selection.In the chat overview, select the chat that you want to delete. Then tap on the “Recycle Bin” menu icon or to create a selection.
Confirm the deletion process when prompted.When prompted, confirm the deletion.
Deleting multiple or all chatsDelete multiple or all chats
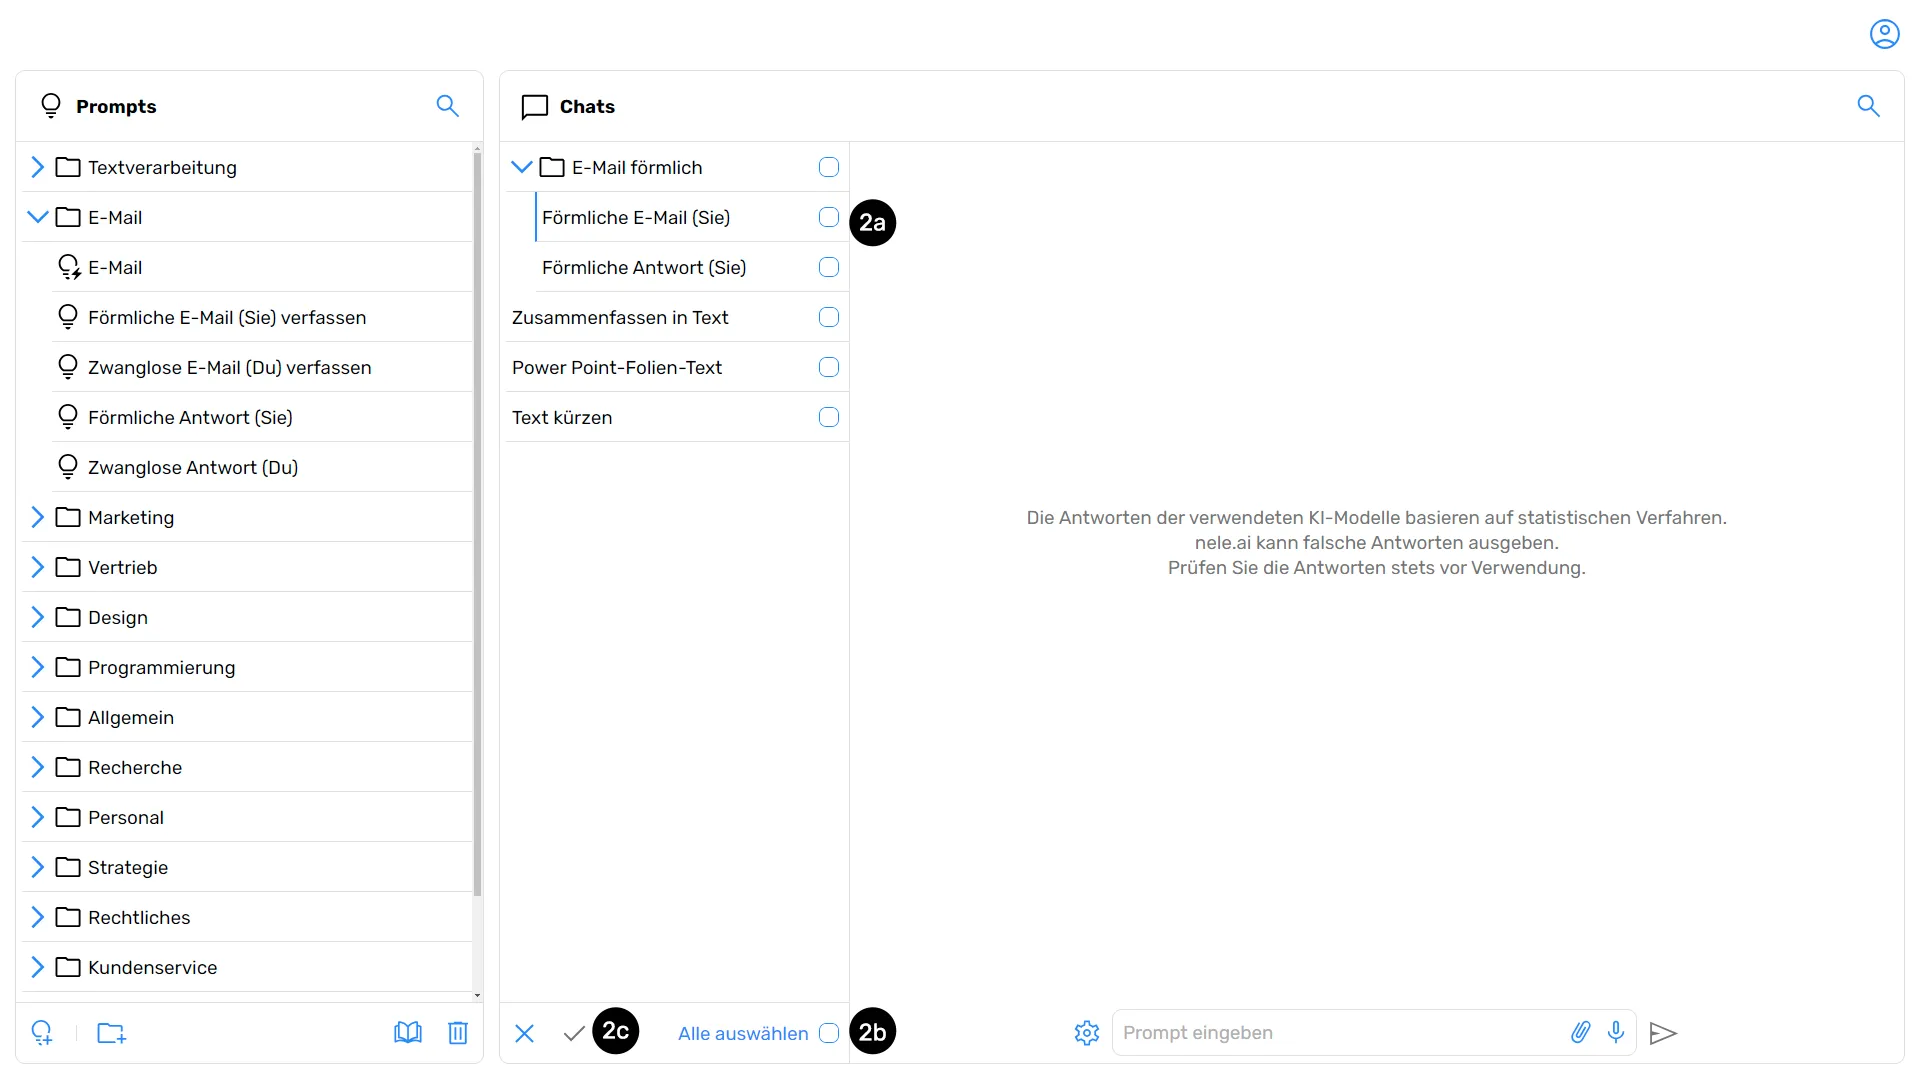
Select the "Trash" option (2) located in the bottom right of the chat menu. Now, check the boxes for individual chats (2a). Alternatively, click "Select all" (2b) if you wish to select all chats and delete them at once.Select the “Recycle Bin” option off, which is at the bottom right of the chat menu. Now check individual chats . Alternatively, click “Select All.” if you want to select all chats and then delete them.
Finally, click "Confirm delete" (2c) to confirm your selection and delete the items.Finally, click “Confirm deletion.” to confirm the selection you have made and the deletion.
Sorting and moving chatsSort and move chats

In the chat overview, click on the chat you want to move.In the chat overview, click on the chat that you want to move.
Hold down the left mouse button and drag and drop the chat to the desired location or into an open folder.Hold down the left mouse button and drag and drop the chat to the desired location or into an open folder.
Renaming chatsRename chats

In the chat overview, select the chat you want to rename and click "Edit chat" (1). Enter the new name for the chat and confirm by clicking "Save" (1b).In the chat overview, select the chat that you want to rename and click “Edit chat.” . Enter the new name for the chat and confirm with “Save”
Organizing chats in foldersOrganize chats into folders
Create a folderCreate a folder
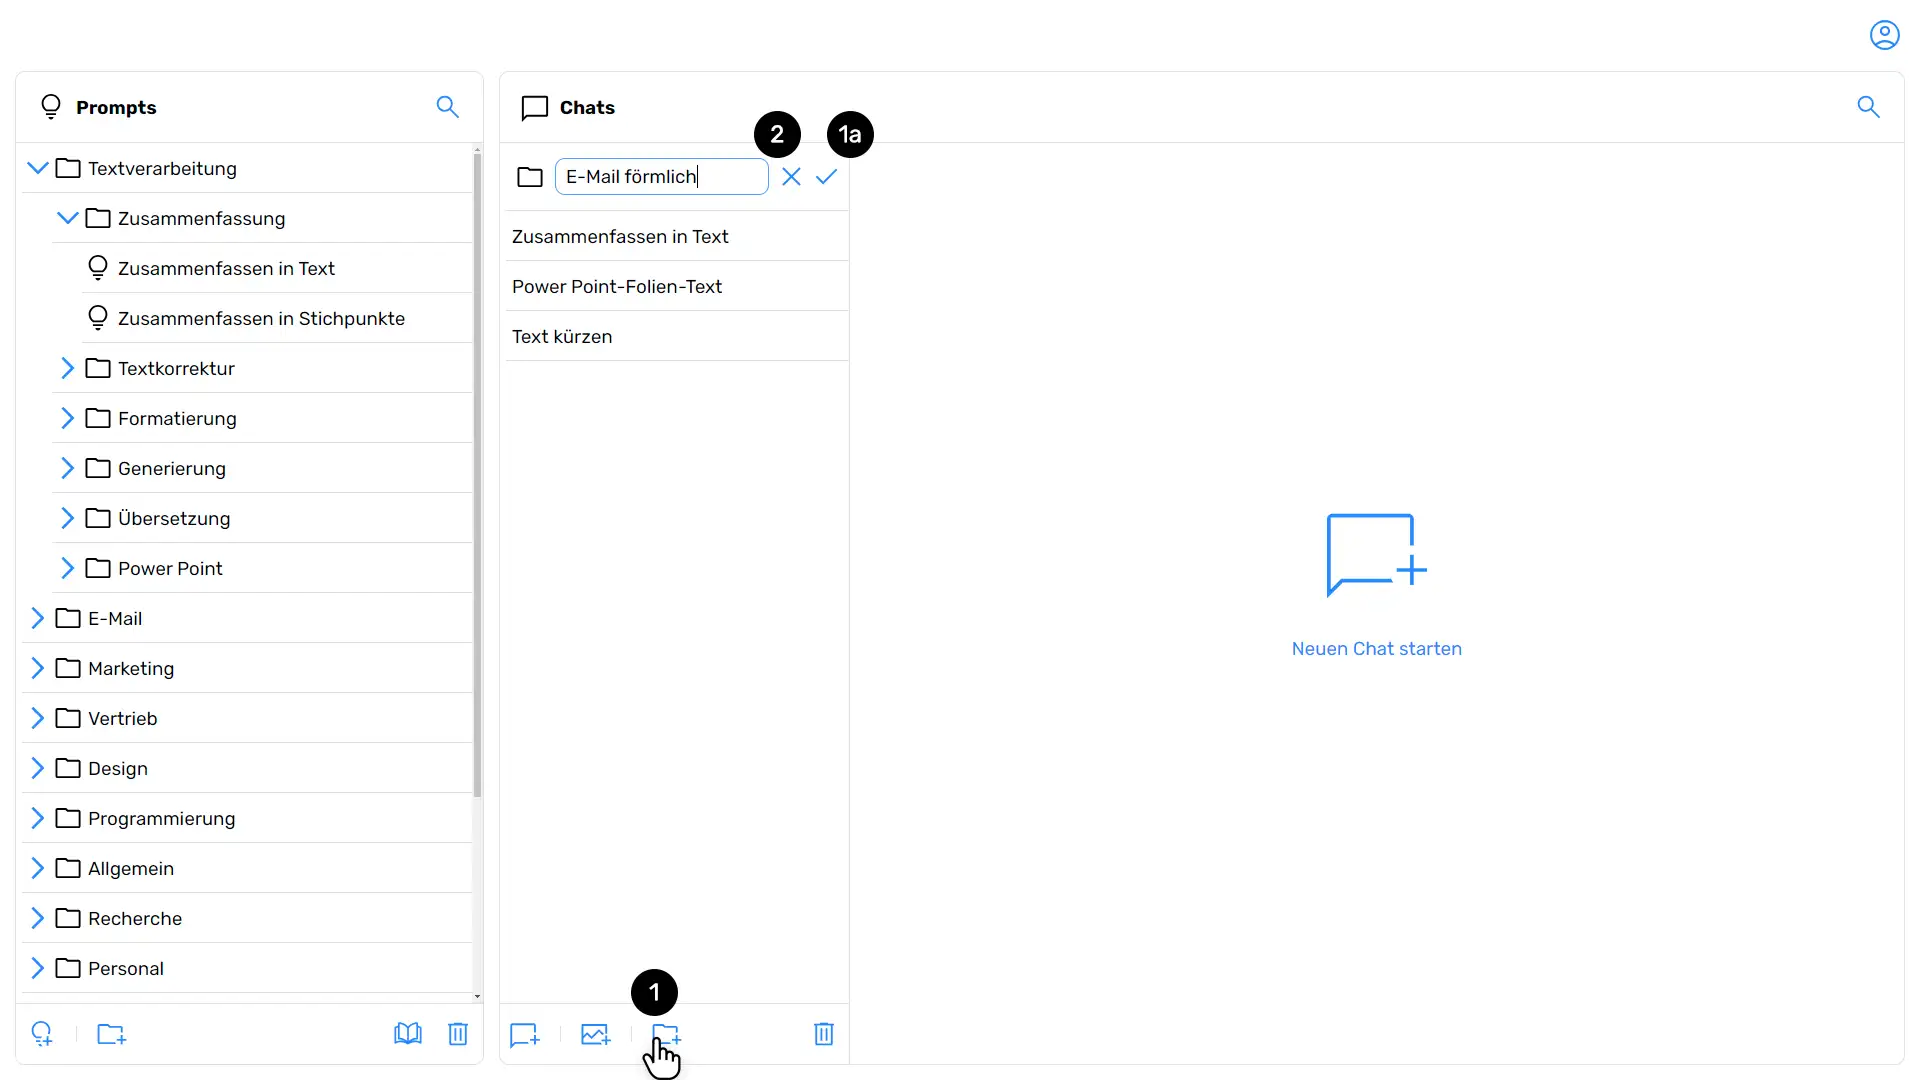
In the chat overview, click on the new folder icon, represented by a folder with a plus sign (1), to create a folder. Then, give it a name and confirm your entry by clicking "Save" (1a). Alternatively, you can select "Cancel" (2) to discard the process.In the chat overview, click on the icon for a new folder, which is represented by a folder with a plus to create a folder. Then give it a name and confirm your entry with “Save” . Alternatively, you can choose Cancel to discard the operation.
Delete a folderDelete a folder
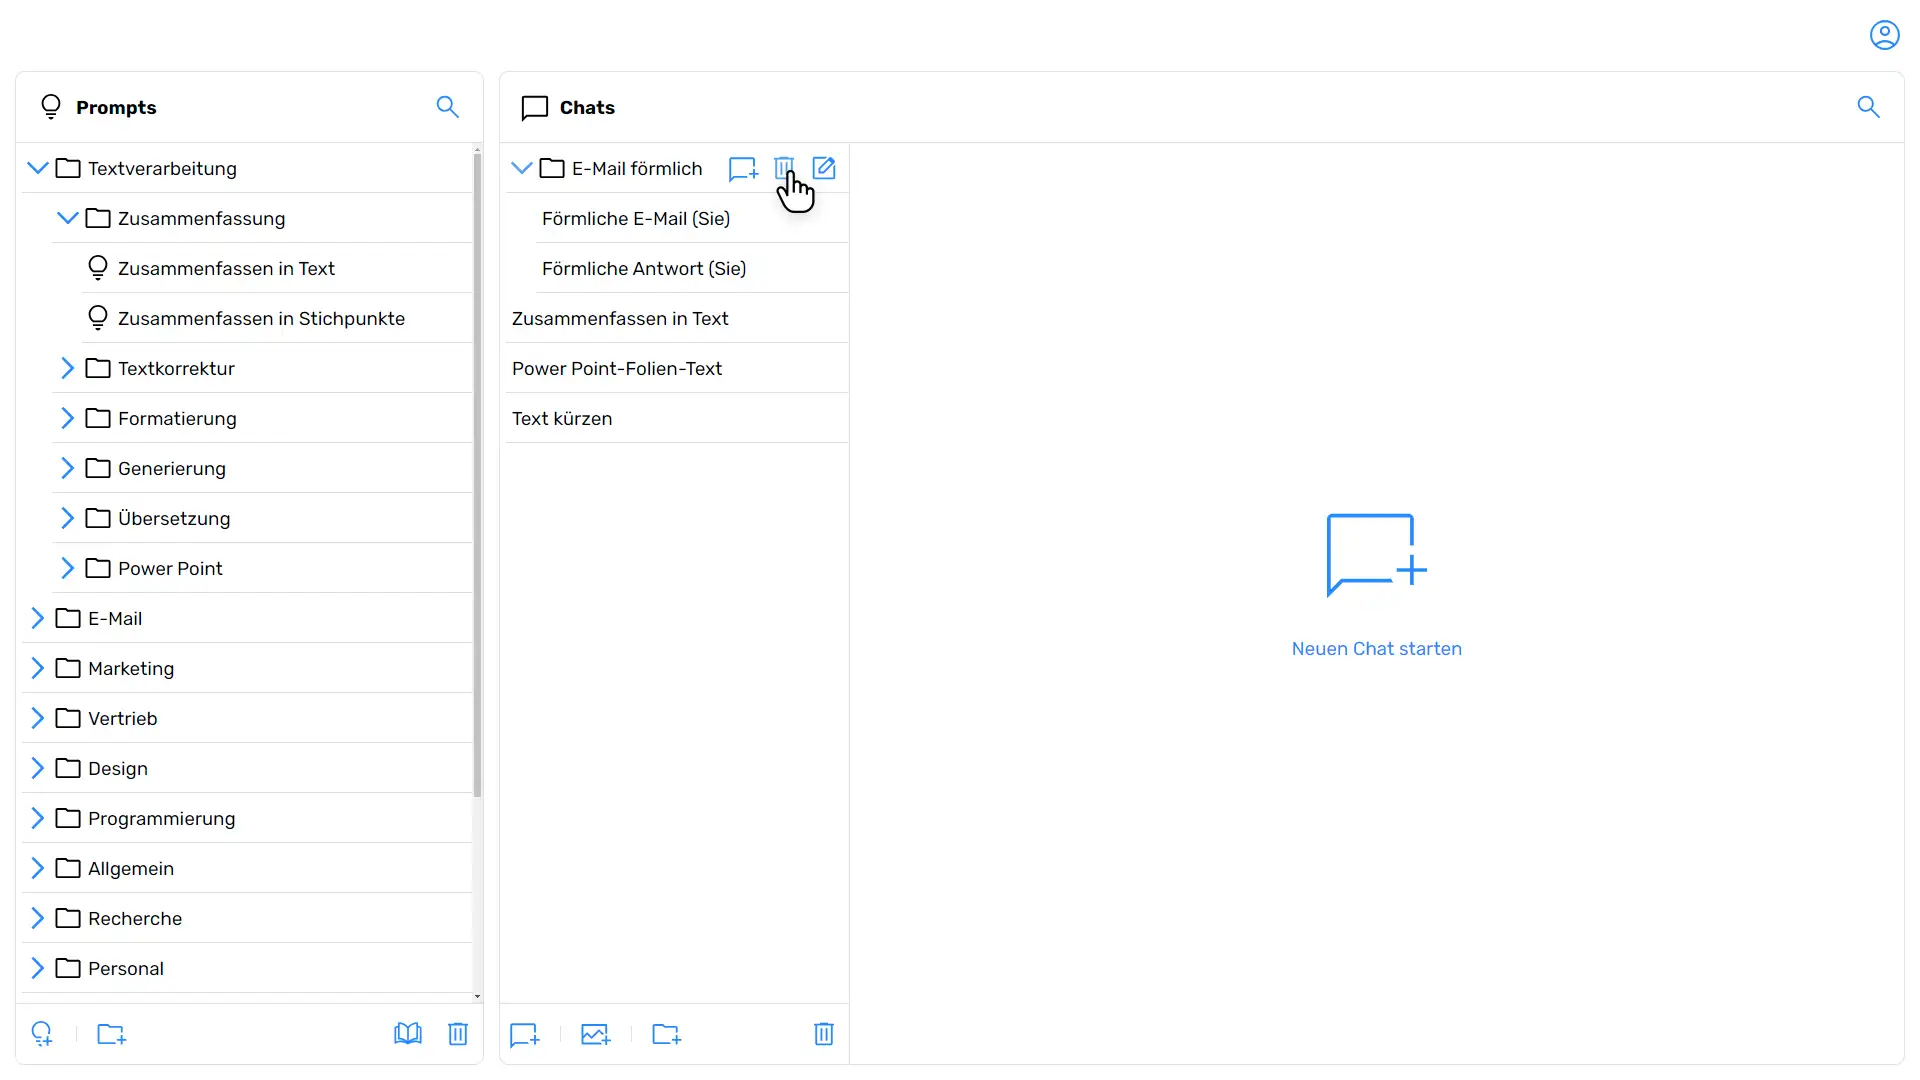
In the chat overview, select the folder you want to delete. Now click on the "Trash" menu icon and confirm the deletion when prompted.In the chat overview, select the folder that you want to delete. Now click on the “Recycle Bin” menu icon and confirm the deletion when prompted.
Moving a folderMove a folder
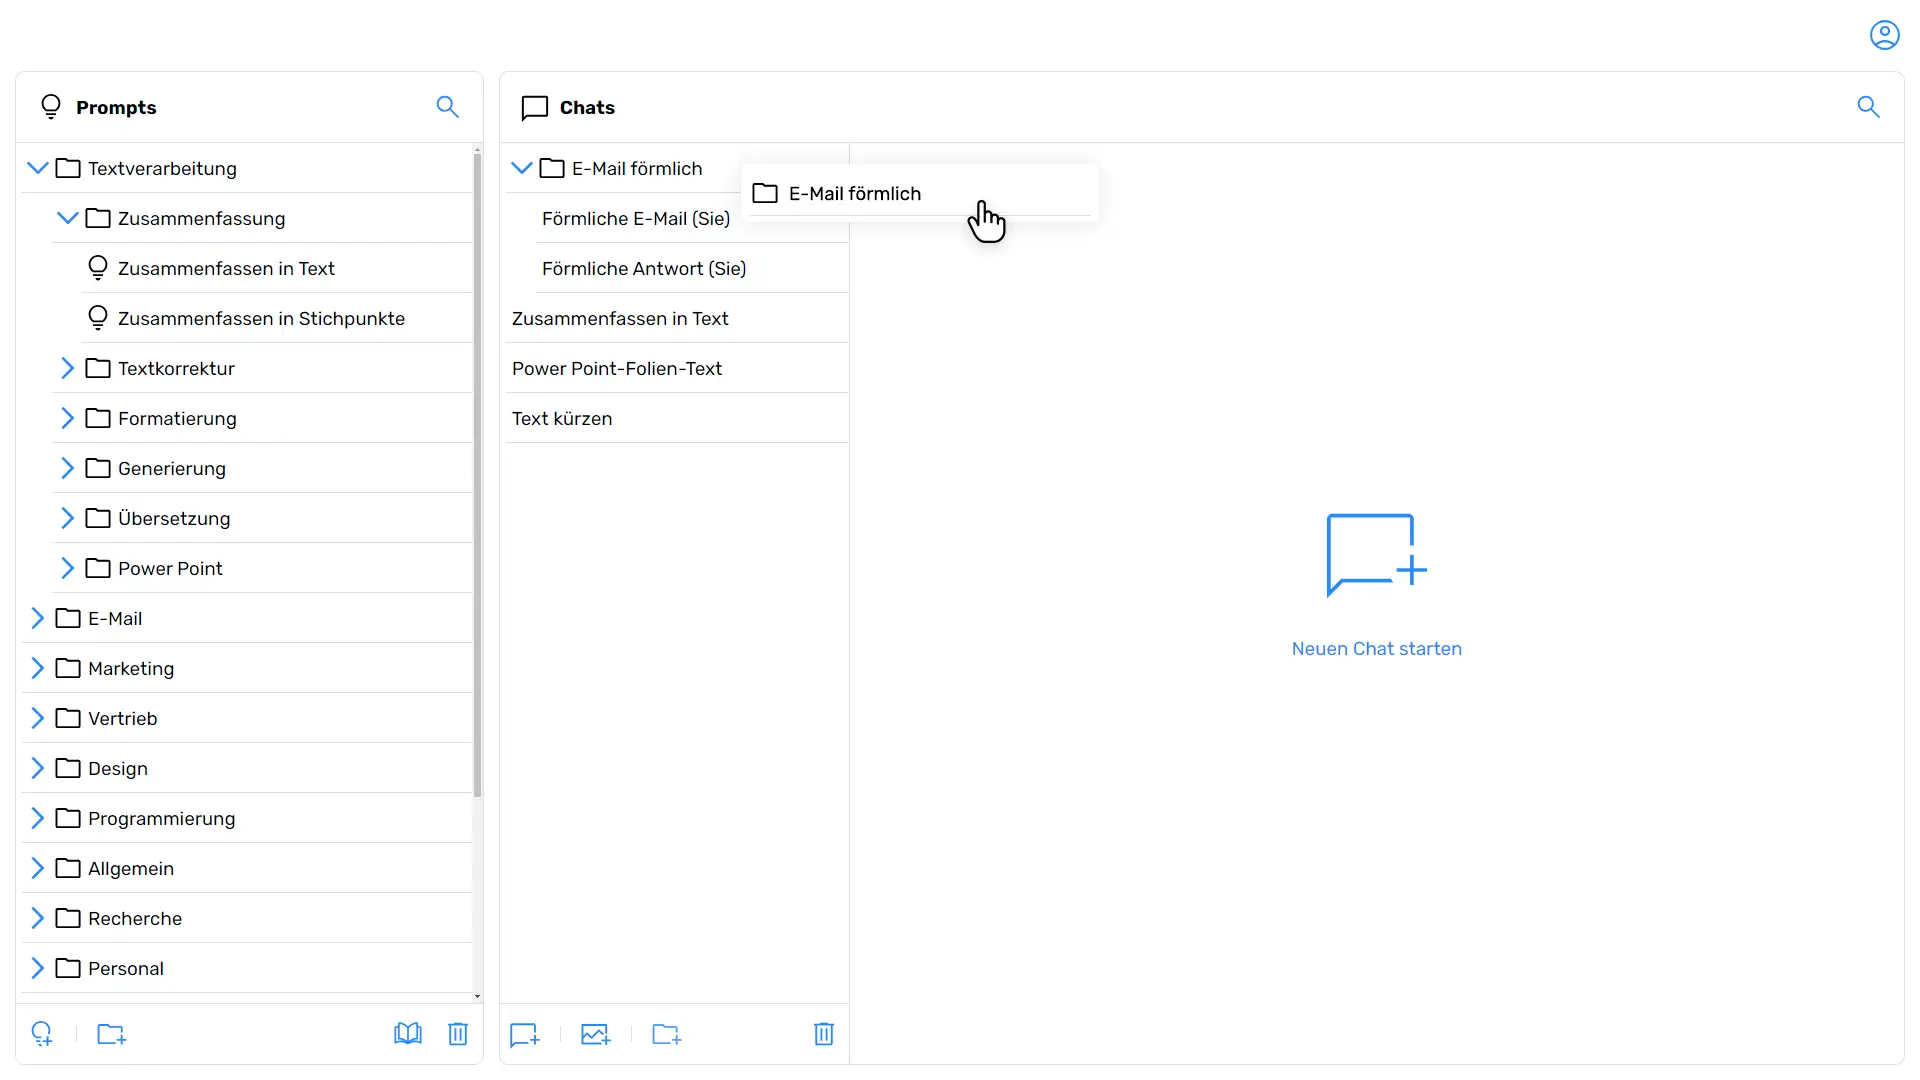
In the chat overview, click on the folder you want to move. Hold down the left mouse button and drag and drop the folder to the desired location.In the chat overview, click on the folder that you want to move. Hold down the left mouse button and drag and drop the folder to the desired location.
Renaming a folderRename a folder
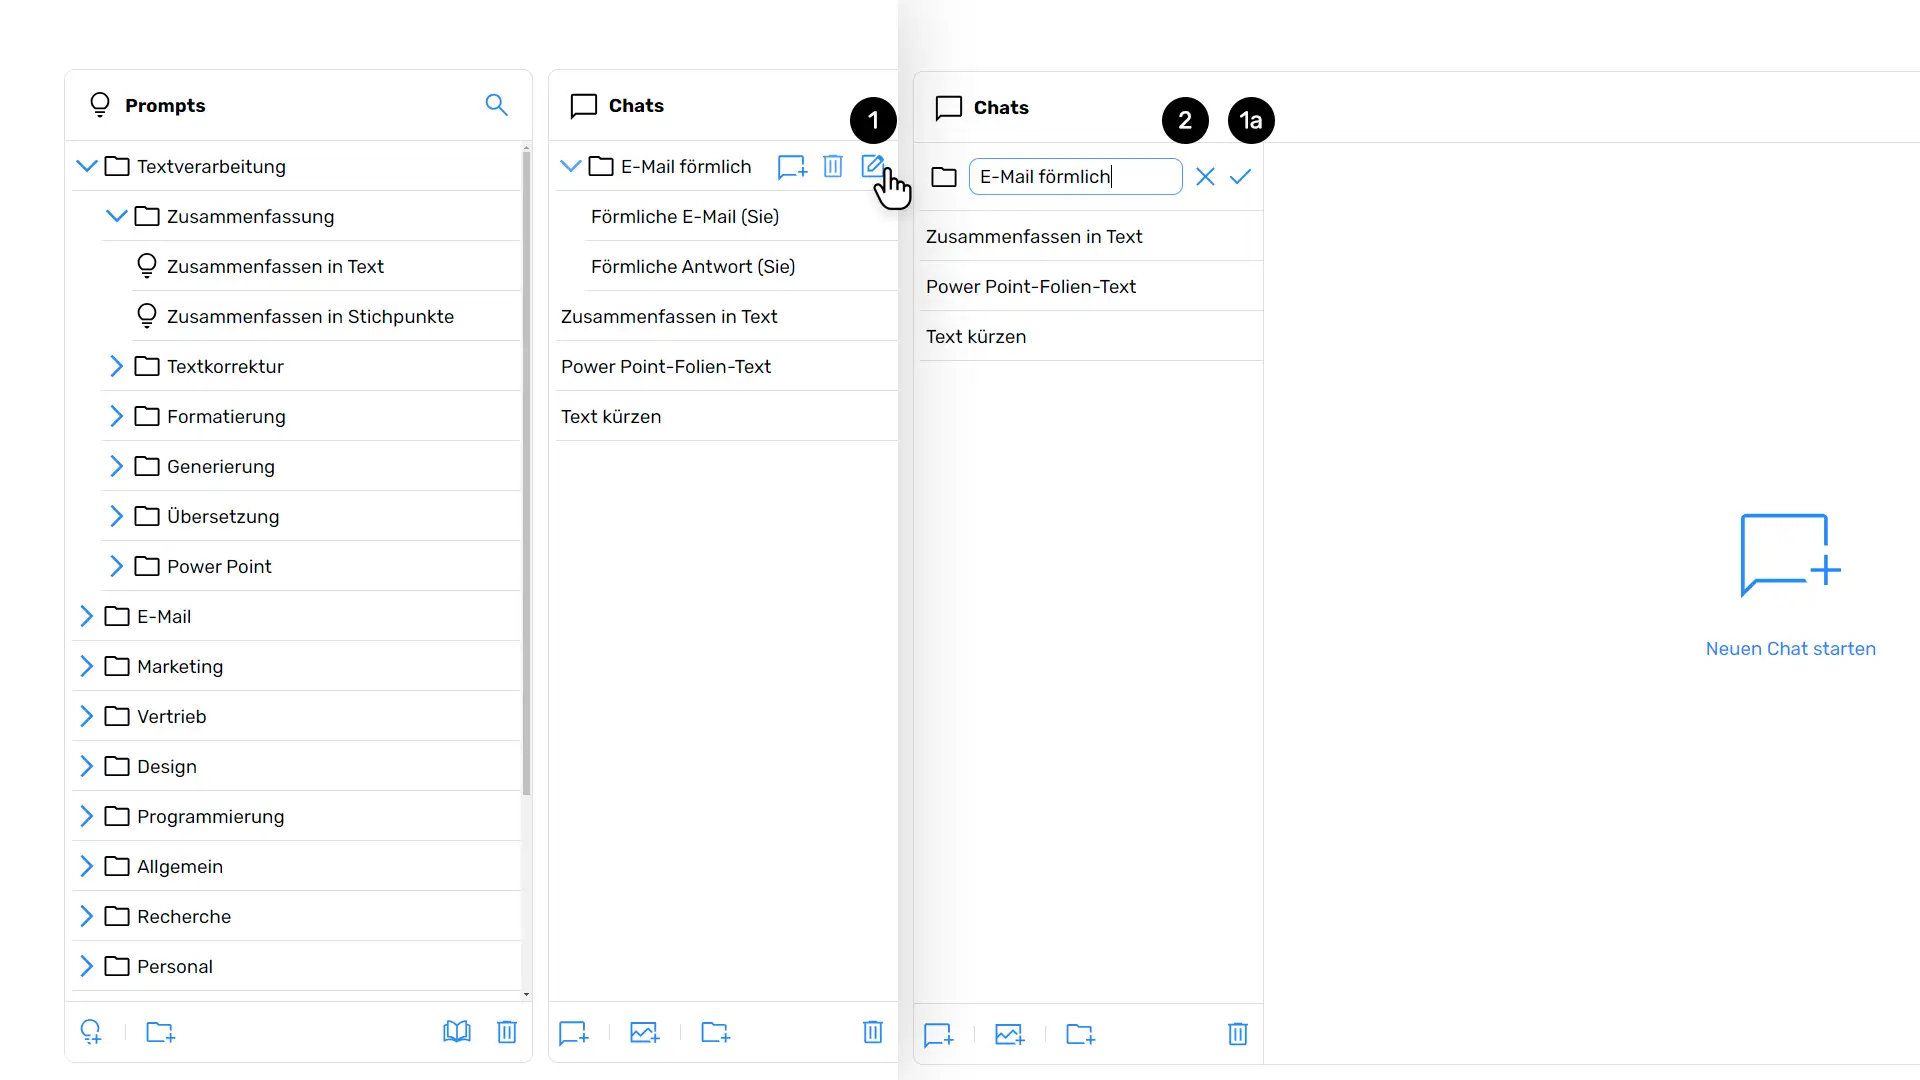
Select the folder you want to rename, then click the pencil icon, which represents "Edit folder" (1). Enter a new name for the folder and confirm your entry by clicking "Save" (1a). Alternatively, you can select "Cancel" (2) to discard the changes.Select the folder that you want to rename and then click the pencil icon that stands for “Edit Folder.” . Enter a new name for the folder and confirm your entry with “Save” . Alternatively, you can choose Cancel to discard the operation.