Groups
Here you can create user groups for structured management of permissions and resources. The group function allows you to organize multiple users simultaneously and grant them collective access to AI models, knowledge databases, and other system resources.
Feature overview
Creating and Managing Groups
Use the "Create Group" button (1) to add a new group. To remove a group, use the trash icon in the "Options" column (2).
The search function (3) allows you to quickly and easily find groups that have already been created. When you enter a search term, the group overview will only display entries that match your search criteria.
In the overview table, you can see the most important information for each group at a glance: Name (4), assignments of AI models, knowledge databases, content filters and the assigned credit limit (5), the current status (6) as well as the editing options (7).
User assignment to groups takes place during invitation, via user settings in the user area, or through SSO groupings. Within the group area itself, user assignment cannot be managed - only group permissions can be configured here.
Configure group settings
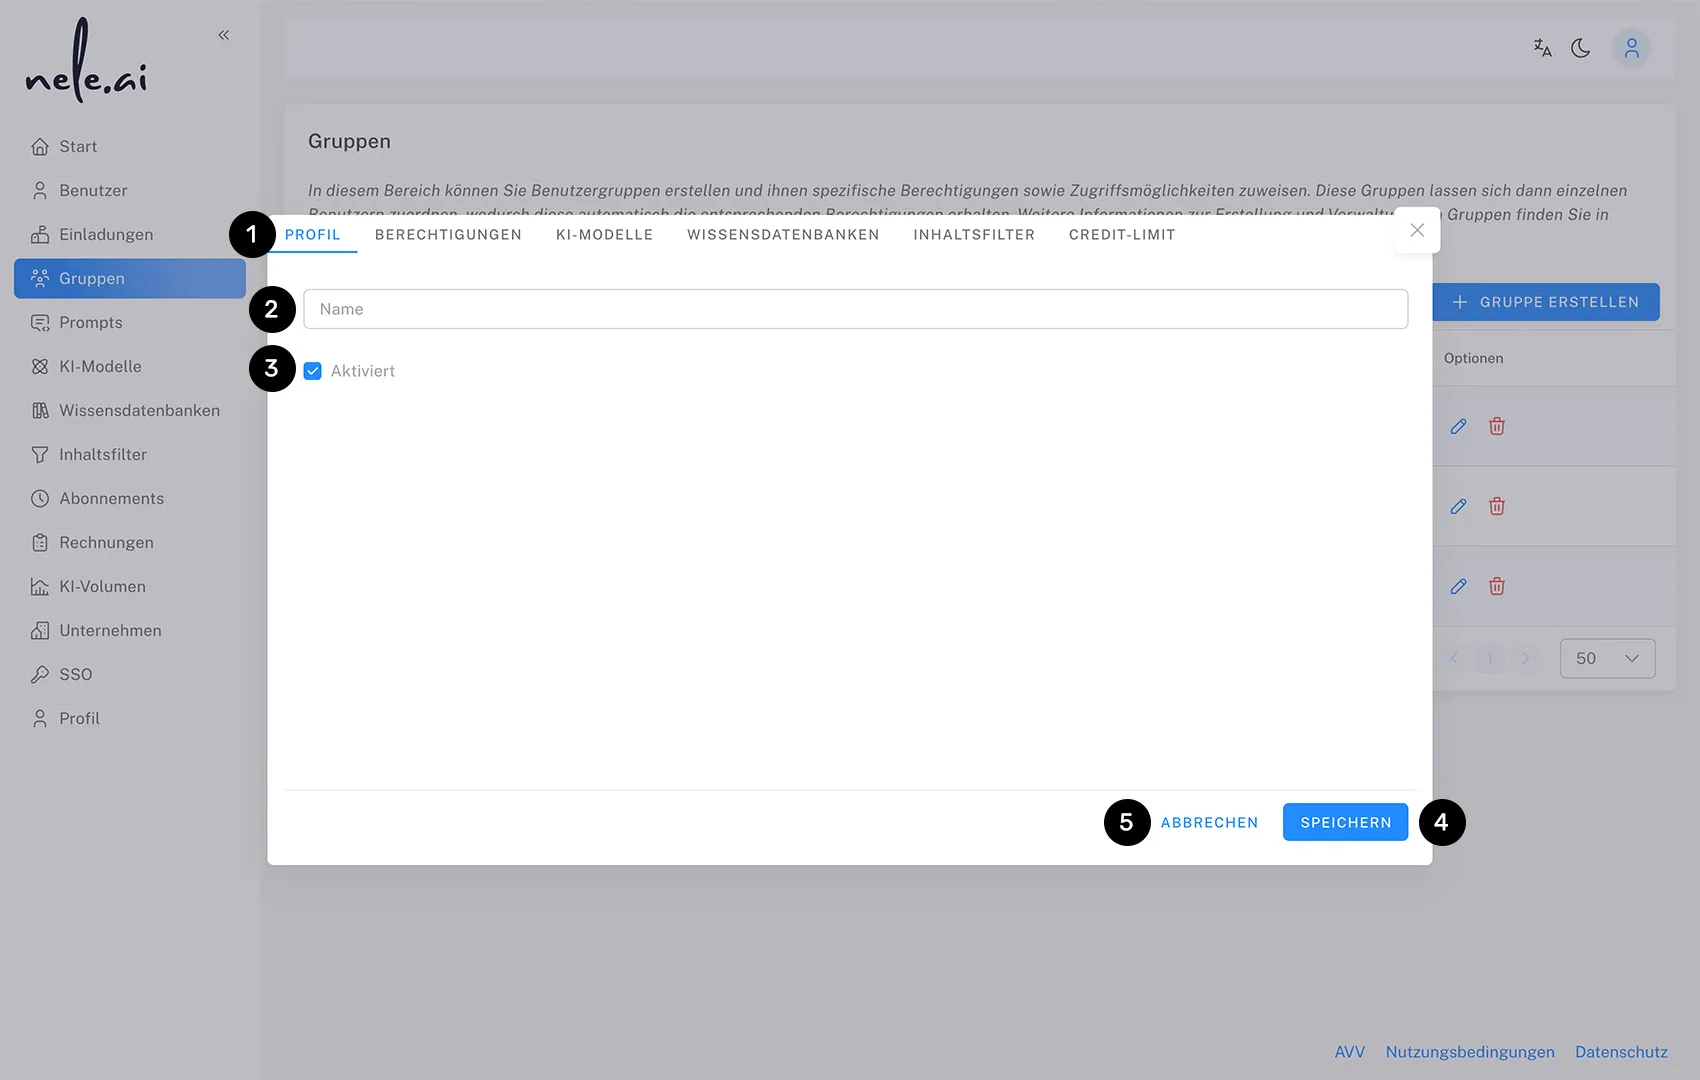
Click “Create Group” or the pencil icon of an existing group to open the group settings. In the Profile tab (1) Can you give the name of the group (2) and via the “Activated” checkbox (3) Determine whether the group is active and its permissions apply to the assigned users.
The approvals and limits of a group only apply to the assigned users if the group is active. Deactivated groups have no effect on user experience.
Confirm your settings with “Save” (4) or select Cancel (5) to complete the process without saving.
Assigning AI models to groups
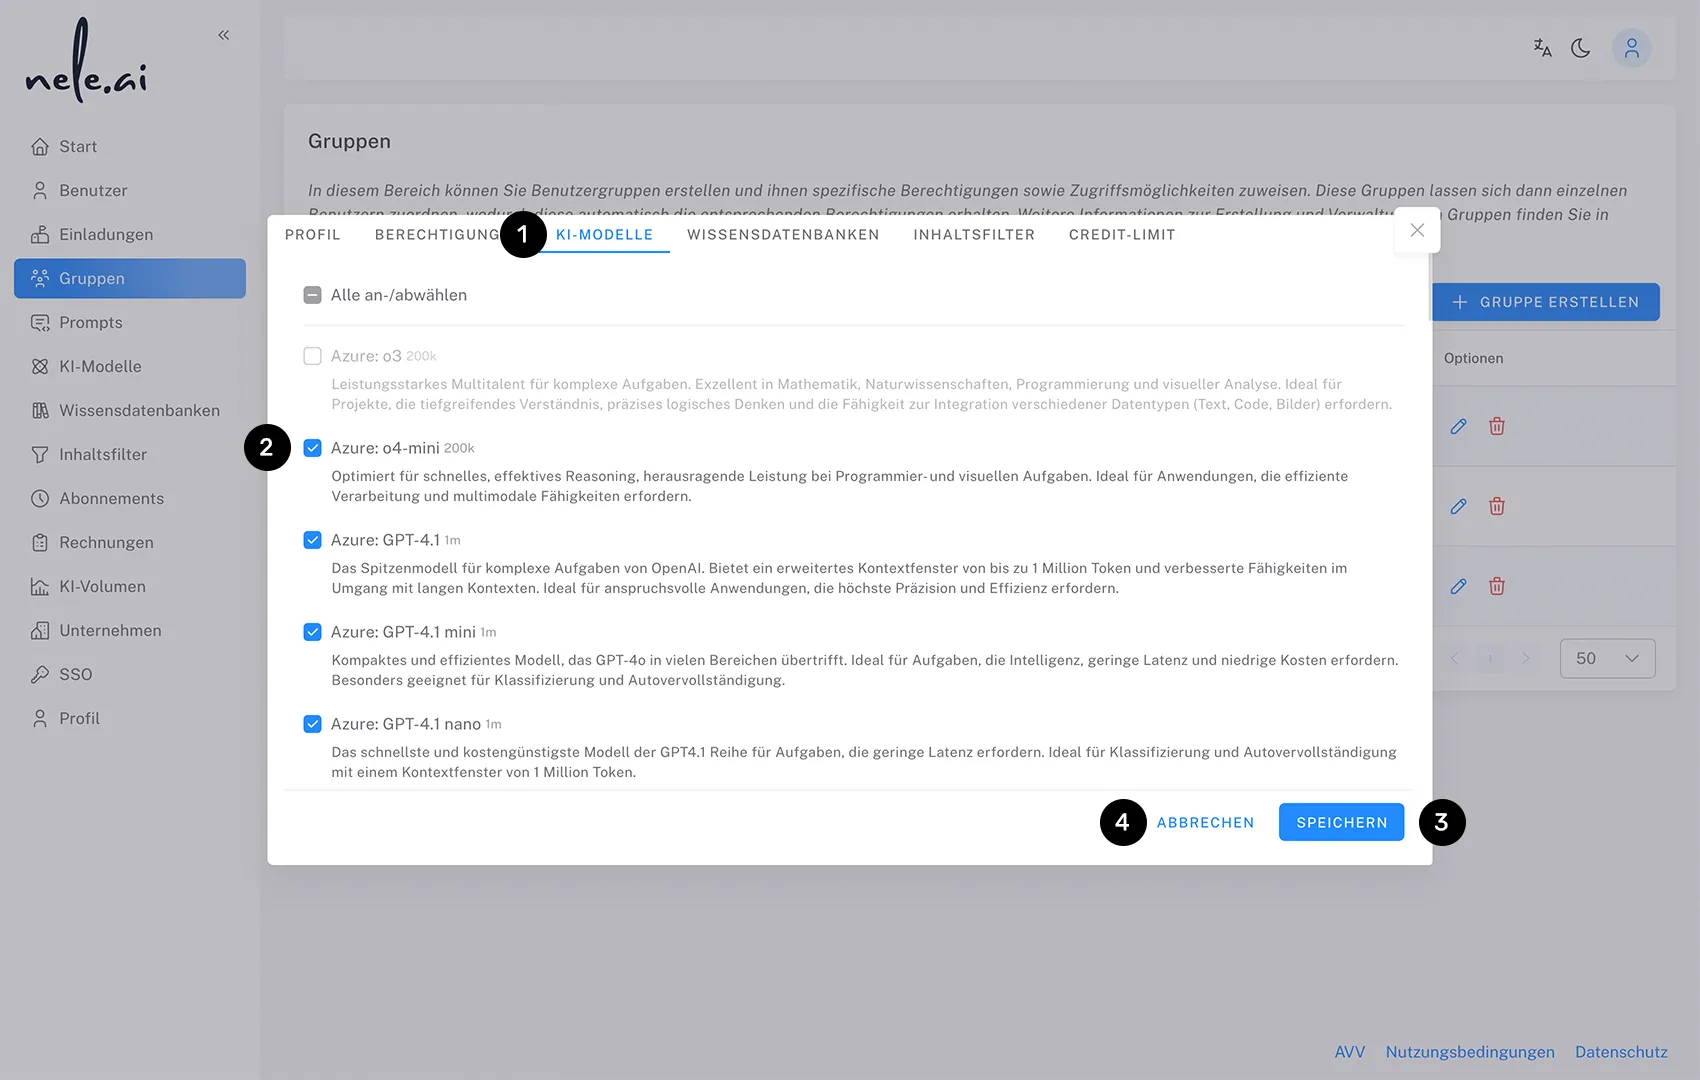
Switch to the “AI models” tab (1) to determine which AI models should be available to group members.
Select from a checkbox to the left of the respective entries (2) which models are assigned to the appropriate group. The assignments of AI models are additive to the settings that individual users already have.
Finally, confirm with “Save” (3) or select Cancel (4) to complete the process without saving.
Assigning knowledge bases to groups

Switch to the Knowledge Bases tab (1) to determine which knowledge databases should be accessible to the group.
Select from the checkbox on the left of the respective entries (2) which knowledge databases are assigned to the appropriate group. This allocation is additive to the individual user authorizations that already exist.
Finally, confirm with “Save” (3) or select Cancel (4) to complete the process without saving.
Configure content filters for groups
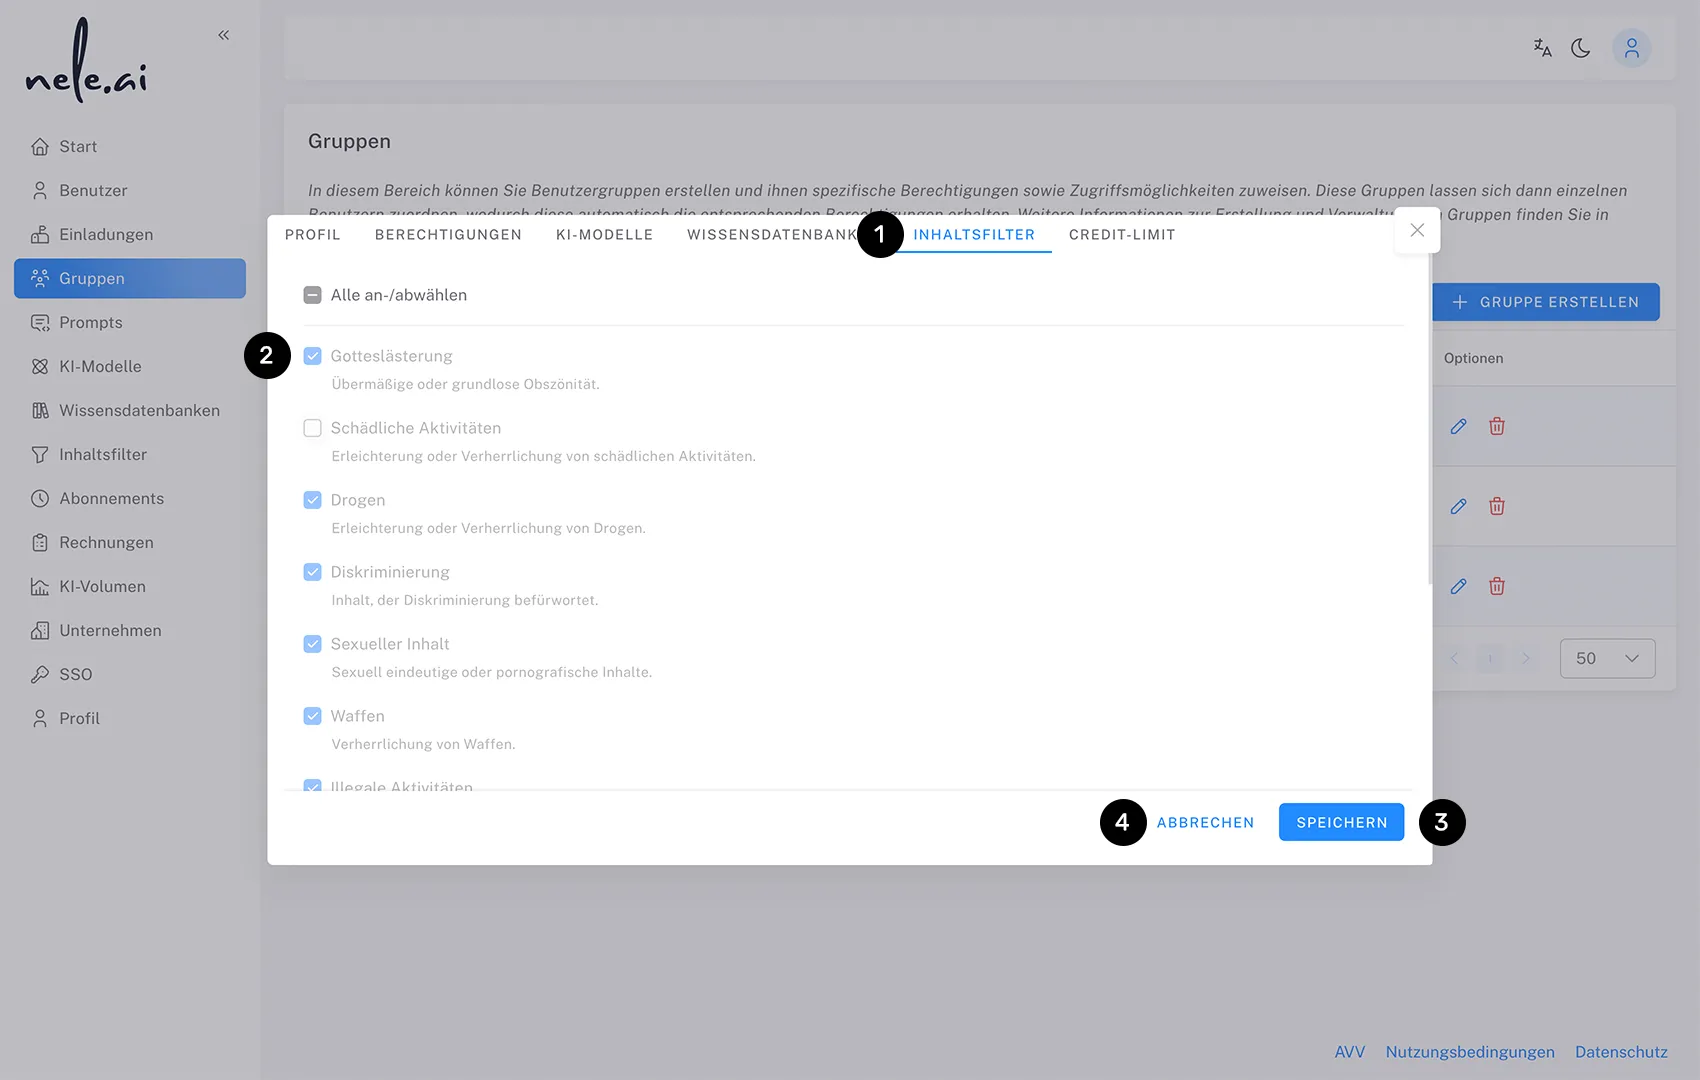
Switch to the “Content Filter” tab (1) to configure content filters for the group. Content filters help to control the spending of AI models in accordance with organizational guidelines.
Select from the checkbox on the left of the respective entries (2) which content filters should be activated for the corresponding group. The filter settings complement each other additively to the individual user settings.
Individual users can be assigned to several groups at the same time. In this case, too, the approvals and limitations are additive.
Finally, confirm with “Save” (3) or select Cancel (4) to complete the process without saving.
Set credit limit for groups
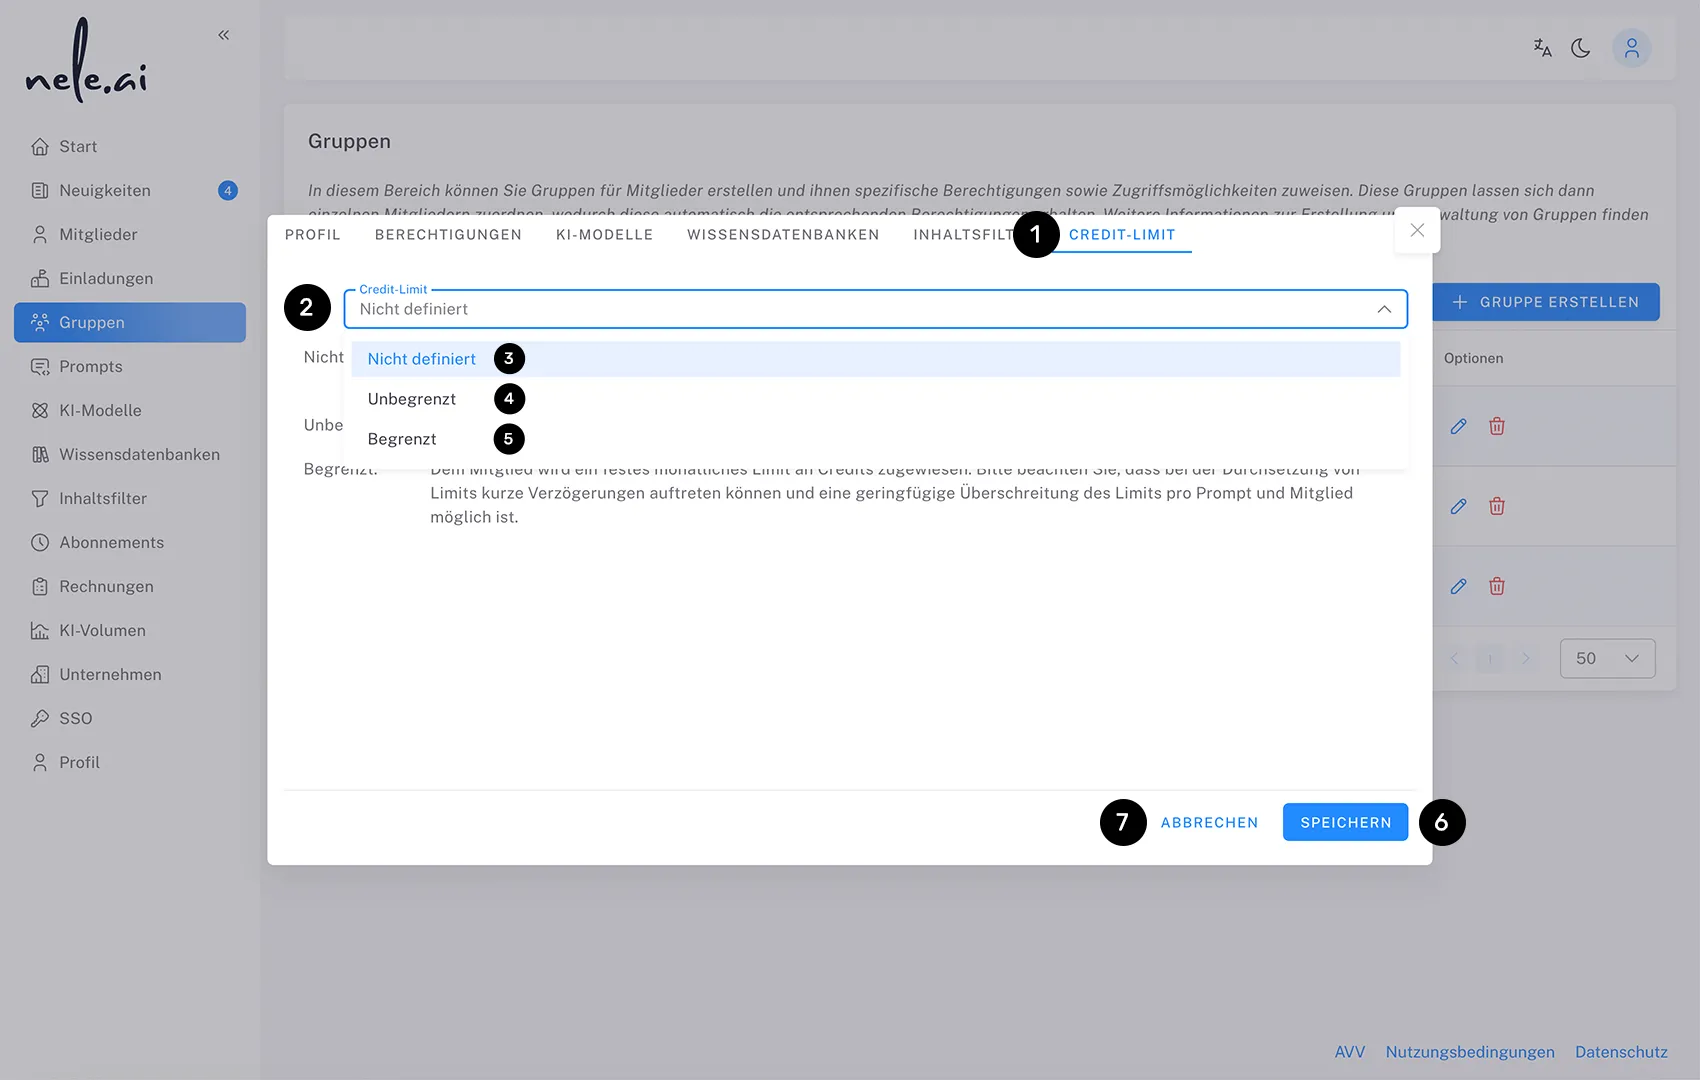
Switch to the “Credit Limit” tab (1)to set a monthly spending limit for each individual member of the group.
From the drop-down menu, select (2) one of the following options:
Not defined (3): Users either receive a limit from another group membership or they have no limit if no other group sets a limit. The highest limit of a group counts.
Unlimited (4): Users can use the system without limits.
Limited (5): Users are assigned a fixed monthly limit. Set the limit directly in credits (one credit is approximately one cent). Please note that there may be short delays in enforcing limits and that the limit may be slightly exceeded per prompt and user.
In the case of a credit limit, a user is always subject to the highest, specifically set limit assigned to a user, individually or from several groups.
Finally, confirm with “Save” (6) or select Cancel (7)to complete the process without saving.
Manage multiple groups at the same time
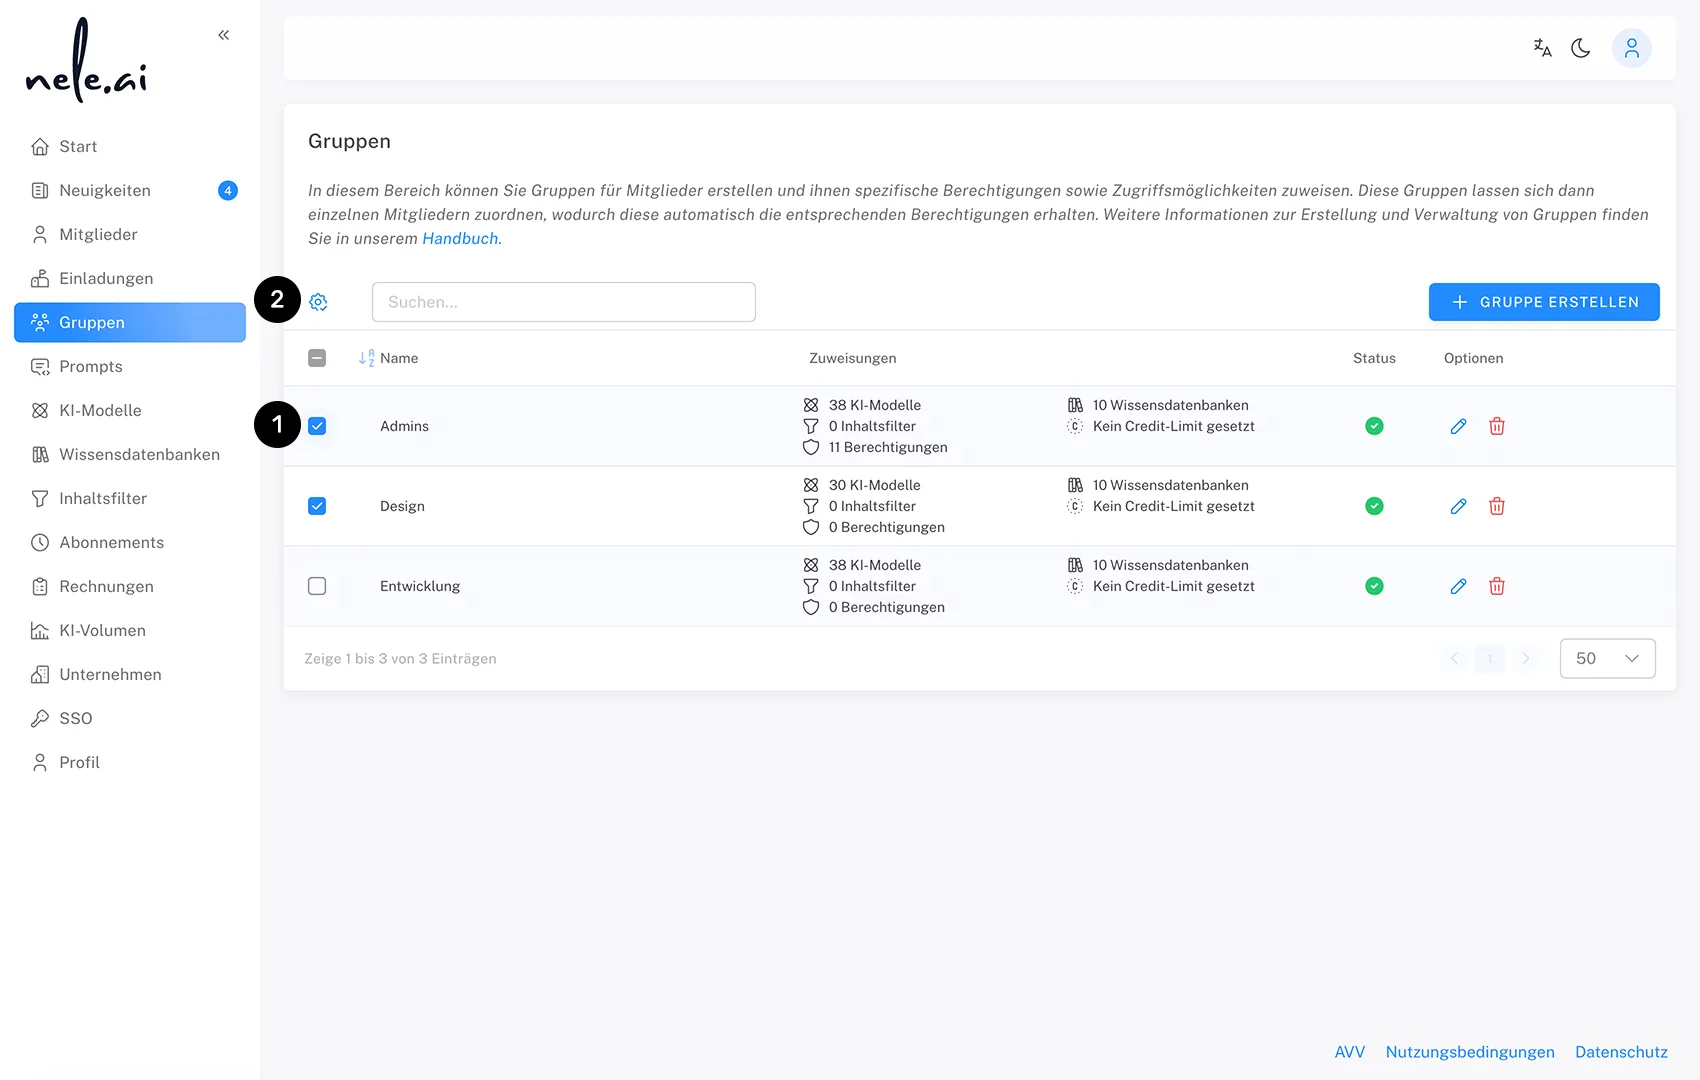
If you want to adjust the same settings for several groups at the same time, click on the checkbox to the left of the corresponding columns and make your group selection first (1). Then click on the gear icon (2) and select the action you want to take from the drop-down menu.